Showing posts with label WWI. Show all posts

Sunday, 8 June 2025

Battle for Husiatyn - WWI Eastern Front

 Lisa, Arthur and I played scenario 6 from the historical campaign she's preparing based on the service of the Royal Navy's Armoured Car Expeditionary Force on the Eastern Front in 1917.  Today's game is based on action at Husiatyn in Galicia.  The Russians and their British allies want to stop the Germans from crossing the bridge and capturing the town.

We used Fistful of Lead Bigger Battles for this game, same as with the others in this series.

Russians and Brits start on the road across the top of the photo, and the Germans on the lower side of the photo.  Germans want to cross the river, which can be done at the bridge at regular speed or they can wade the river, treating it as difficult terrain. The airplane represents an observation balloon, which the Germans can use to call off-board artillery strikes.  The observer called in shots turn after turn until late in the game, when the Pierce-Arrow armoured car finally knocked it out of the sky.


The day was a foggy one, so every turn a die is rolled to see if the fog settles in, restricting vision to half range.  If it is already foggy, then a test is made to see if the fog lifts.  The fog came in early in the game, which allowed the forces to advance unhindered by their opponent's actions.

Here the German MG has crossed the bridge, but had to deploy quickly, without taking cover, to respond to the Lanchester AC that appeared through the mist.


Other German forces attempted to wade through the river. The two-man sniper team was eliminated by Russian and British fire before it was able to get into position.


In a rare occurrence, the German flamethrower team was able to fire its weapon, at its extreme range.  They only had minimal effect, adding a single point of shock onto the Lanchester. The car immediately returned fire and wiped out the flamethrower.


A firefight developed, between the MG, infantry and two British cars.


My photography was a bit off here - the Russian cavalry charged and eliminated a German infantry unit, and were then driven off by rifle fire from another unit. 


As the Russian cavalry regroups, an infantry unit moves to keep the pressure on the Germans.


After the Germans wading across the river were defeated, the focus turned to the remaining forces at the end of the bridge.  The smoke puff represent shock.


Russian infantry quite sensibly use the Rolls Royce as cover,


Only to be dismayed as the car is taken out by an off-board artillery strike!


Meanwhile the Russian cavalry regrouped, then charged and wiped out an infantry unit and the MG that was adjacent to it.


Glamour shot of the Russian infantry.


Victorious Russian cavalry!


RNAS Pierce-Arrow Armoured Lorry.  This was quite a beast, porting around a 3" QF field gun.


Thanks, Lisa, for writing a great scenario pack.  Looking forward to playtesting the final scenario soon!

Saturday, 31 May 2025

WWI Eastern Front - Between Kuropatniki and Taurow, Galicia 1917

Today, Lisa and I playtested another of her scenarios featuring Locker-Lampson's armoured cars on the eastern front in 1917.  In this one, the Austro-Hungarian troops (again proxied by my WWI Germans) must cross the table (bottom to top in the image below) as Locker-Lampson's cars try to stop them.


KuK troops - officer, three teams of 10 riflemen and a 2-man flamethrower team.


The armoured cars.  Ford Model T armoured car, which can only fire to the rear, plus the Rolls Royce and the Lanchester, all three armed with machine guns.


Lanchester AC advances on the table.


KuK move up, working up the nerve to cross the open ground.


KuK take advantage of the cover provided by the woods.


Infantry unnerved by the approaching cars open fire, and disable the Ford.


The Lanchester focussed its fire on the flamethrower team.  The flamerthrower was disabled before they had a chance to fire, so unfortunately we didn't get to see how devastating it could have been!


The infantry laid down fire on the Lanchester, imposing shock and forcing it to fall back.  They then attempted to dash across the open ground, thinking that the car was too suppressed to act.  Turns out they were wrong!  The crew made all their saves, and opened fire on the infantry when they were in the open.


Things went a bit better on the other side of the table had more success.  Heavy rifle fire managed to disable the Roller.


The Lanchester saw that the first group of infantry were making a break for the table edge.  It rushed forward to fire on them, but its fire was not enough, and the KuK got their first team off the table.


The last squad of infantry managed to disable the Lanchester.


Final result was that two teams of infantry plus the officer cleared the table in the time available, for three victory points.  The last rifle team would also have cleared the table as well, but not within the time limit.  The RNAS only eliminated one team, so final points count was 3:1 in favour of the KuK.  The scenario was tense, a near-run thing, and most importantly, fun!  We have two more scenarios yet to play, so there will be more reports before too long.


Saturday, 10 May 2025

More Eastern Front WWI - The Road to Monasterzyska

Lisa stopped by this afternoon for a playtest of the next scenario in the adventures of the RNAS armoured car squadron on the eastern front in WWI.  In this scenario, the Russian army is in retreat, and the armoured cars are assisting Russian infantry and Finland Dragoons in escorting ambulances on the road to the town of Monasterzyska in Galicia (now part of Western Ukraine, but in 1917 this was part of the Austro-Hungarian Empire).  As usual, my WWI Germans proxy in for the Austro-Hungarian KuK forces.

We rolled for leader traits before starting the game.  Amusingly, we ended up with negative or neutral traits for almost every unit.  Unfortunately for Arthur, the veteran Finland Dragoons ended up being led by a shirker, so these guys were prevented from charging anyone who hadn't already attacked them!  One of the KuK infantry units had the same trait, so there was a built-in resistance to action right from the very start.

Here is the table.  The Russian ambulances enter on the left and must exit by one of the two roads on the right.  The telegraph poles have no effect on the game, and are likely anachronistic for this part of the old A-H empire.


KuK infantry move up to cover the fork in the road.


Russians and RNAS move on to the table.


Finland Dragoons threaten the KuK infantry.


but then they decide to screen the ambulances from the other side of the road (as their leader unconvincingly tries to explain why he isn't attacking the enemy).  Meanwhile, their more enthusiastic infantry tovarischi engage in a firefight, inflicting shock as noted by the puff of smoke.


The ambulances move forward screened by the infantry and dragoons.  The tan truck is a proxy for the second ambulance.


The Austro-Hungarian artillery don't recognise the proxy ambulance and destroy it!  Meanwhile the KuK infantry in the crater are suppressed by the Russians and the armoured cars.


The field gun turns its deadly power on the RNAS Lanchester, destroying it.  The Rolls Royce uses the destroyed ambulance as cover.


The field gun plays an ace, a wild card, as a 6 which allows a free reload, and it destroys the Roller!


The game ended up a draw.  One of the two ambulances escaped.  The Anglo-Russian force lost both armoured cars, one of the ambulances and the dragoons but were able to destroy two of the KuK infantry teams and the A-H officer.  We'll be playtesting another of the scenarios next week.


Saturday, 3 May 2025

Fistful of Lead Bigger Battles on the Eastern Front

Last night, Lisa invited Arthur and me to try another game in her WWI Eastern Front scenarios featuing Lt Cdr Locker-Lampson and the RNAS armoured section during the Kerensky Offensive.  Write up for game one is here. 

This scenario featured a scramble between Locker-Lampson's armoured cars, two sotnias of Cossacks and a zug of königlich und kaiserlich Austro-Hungarian infantry to control the village of Kozova in Galicia in what is now Ukraine, but was still part of the Austro-Hungarian Empire at the start of WWI.  In this scenario, the three forces enter the village from different sides and seek to control the town.  Points were given for each enemy unit wiped out.  In the historic battle, the Cossacks turned on the local Jewish population.  Lisa simulated this that when the ammo dump exploded, Cossack units were required to attack the nearest group of civilians unless the RNAS were within 8" to stop them.

Here is an overview of Kozova.  It was fun to have a chance to get the UmBum buildings and the Bolsheviks and Russian civilians onto the table!  


Bolshevik agitators march past a collection of Orthodox and Roman Catholic clergy.


Two sotnias of Cossack cavalry move onto the table.


Russian casualties being escorted to the train station for evacuation.


Cossacks and RNAS move into Kozova.


And the KuK troops (proxied by Germans in this case) enter at the other end of the village.


Arthur's veteran Cossacks attack and destroy a squad of KuK troops.


KuK infantry face down Cossacks advancing along the railway.


KuK MG manages to take out one of the RNAS armoured cars.


Finally on turn 7, the ammo dump explodes!  We tested each round - this was the trigger for the Cossacks to turn on the local civilians.


As so they did, wiping out the Bolshevik agitators first!


In the end, each side took significant casualties, each force lost two full units, but the Russian/RNAS side were penalised for the attack on the civilians.  As a result, the KuK force squeaked out a win by one point.  Thanks, Lisa, for inviting us to try out this scenario, and we are looking forward to seeing the further adventures of the RNAS armoured cars on the eastern front!

Tuesday, 11 March 2025

Gangsters and WWI games


On Friday evening, Lisa, Arthur and I had our first playtest of Fistful of Lead Bigger Battles.  The game was inspired by Lisa's research into the Kerensky Offensive on the Eastern Front in 1917, where a squadron of Royal Navy Air Service armoured cars reinforced the Russian Army.

The battle featured the Russians and their British allies attacking German trenches.


Lisa included a few special rules, most importantly that when a joker was dealt, one of the Russian infantry units would gain a 1d6 red markers, representing Bolshevik propaganda.  The idea was that any unit that ended up with more markers than troops would be persuaded by the propaganda and leave the battlefield.  As it happened, none of the Russian units reached that break point, but it was fun to pile those markers onto units.

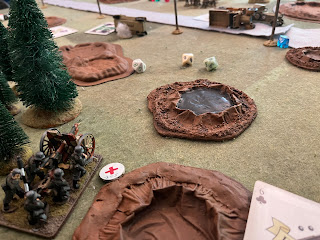
German forces man the trenches.  There was a pre-game bombardment that ended up wiping out the German light machine guns (a Lewis gun team and a MG-08 gun team), and left most of the other units with some shock.


RNAS armoured cars prep for battle: 3 Rolls Royce and 1 Lanchester.


Russian Maxim Gun moves onto the table.


Russian cavalry advances, supported by infantry following up behind.


Russians used this cover to good effect to close with the German infantry.


Russian cavalry charge the German trench.


And then clear the trench!  We used smoke markers to represent shock - as you can see, there is more shock than surviving Germans.  The Germans routed the next time their card came up.


Elsewhere on the line, German defenders attempt an unsuccessful close assault on a RNAS Roller.


However, their assault failed, and then the Germans routed.


In the end, the Russians captured the German trenches.


The verdict is that Bigger Battles gives a good, fun, fast-paced game.  Complexity is similar to a Dan Mersey Rampant-style game.  I had thought that morale might have been an issue, but it wasn't.  Due to the way shock works in this game, a unit that is battered is most likely to fall back and eventually rout off the table.

And then on Sunday, we had our monthly gangsters gaming day.  I got to represent the South Side gang as Moe's Diamondbacks attempted to cut through their territory.  Moe rolled to see how many South Siders were on the street, and ended up with 17 various gangsters ready to stop his single red truck transporting 6 Diamondbacks.


Southsiders open fire on the truck.


They blew out a tire, causing the truck to careen into a nanny pushing a pram.  Morale outrage was assured!


The Diamondbacks, in trench coats, abandon their truck and set off on foot, pursued by angry Southsiders.


After gunning down a Southsider, the Diamondbacks hijack another truck.


But they don't get far - the Southsiders shoot up the hijacked truck and swarm the Diamondbacks as they pile out.


At this point, we pulled the dreaded back-to-back jokers, which is the trigger for the cops to arrive.  Only two of the Diamondbacks clear the table in time, the remainder are arrested.  Most likely, being arrested saved them from rough justice at the hands of the outraged Southsiders!

As a result of this battle, there weren't enough Diamondbacks left to raid my Docksiders' gin joint.  This left me free to bully another business in my neighbourhood into accepting my 'protection'!