Tuesday 26 December 2017

Russian Dragoon

Not much to boast about here.  The only exciting thing is that I finally picked up a paintbrush - first time since August!  This is a Russian Dragoon of the army of Peter the Great, from Ebor Miniatures.  Hopefully, I'll get a chance to paint his 23 friends as well:  this is meant to be the start of a Russian army suitable for 'The Pikeman's Lament'.  


He's a bit fuzzy - that's likely due to me priming him outside in the cold.  Whoops!

Sunday 5 November 2017

Dragon Rampant

I finally made it out to Bonsor for another Trumpeter Club Night.  Hooked up with Doug, Peter and Jim for a game of Dragon Rampant - which was really just an excuse to pull some old models out for a bit of fun.  Jim brought his lizard men, Doug had a whole bevy of men at arms (both foot and mounted), and I brought two retinues:  El Cid era Spanish (which Peter took) and my old Ral Partha orcs.

Last month, we met up a Doug's house for some Lion Rampant fun (Doug's write up is here ). One of the primary reactions to that game was the frustration we had with the rule that ended a turn after the first failed activation.  We had many turns that never even started as the first unit failed the activation, so as a house rule we decided that each unit could test for activation every turn.  As it turned out, there were still lots of units that spent most of the game idle as they failed almost every activation test!  

What follows is a few random shots from the game.  No particular story here:  everyone came together for a big bash in the middle.  Theoretically we were trying to capture the war machine, but it was largely ignored for most of the game. In the end, Doug and I were crushed by the lizardman/Spaniard alliance.

Here we see the Spanish king prepare to charge Doug's knights.  Or possibly vice-versa.  Didn't matter much as the heavy cavalry were pretty good at counter-charging!


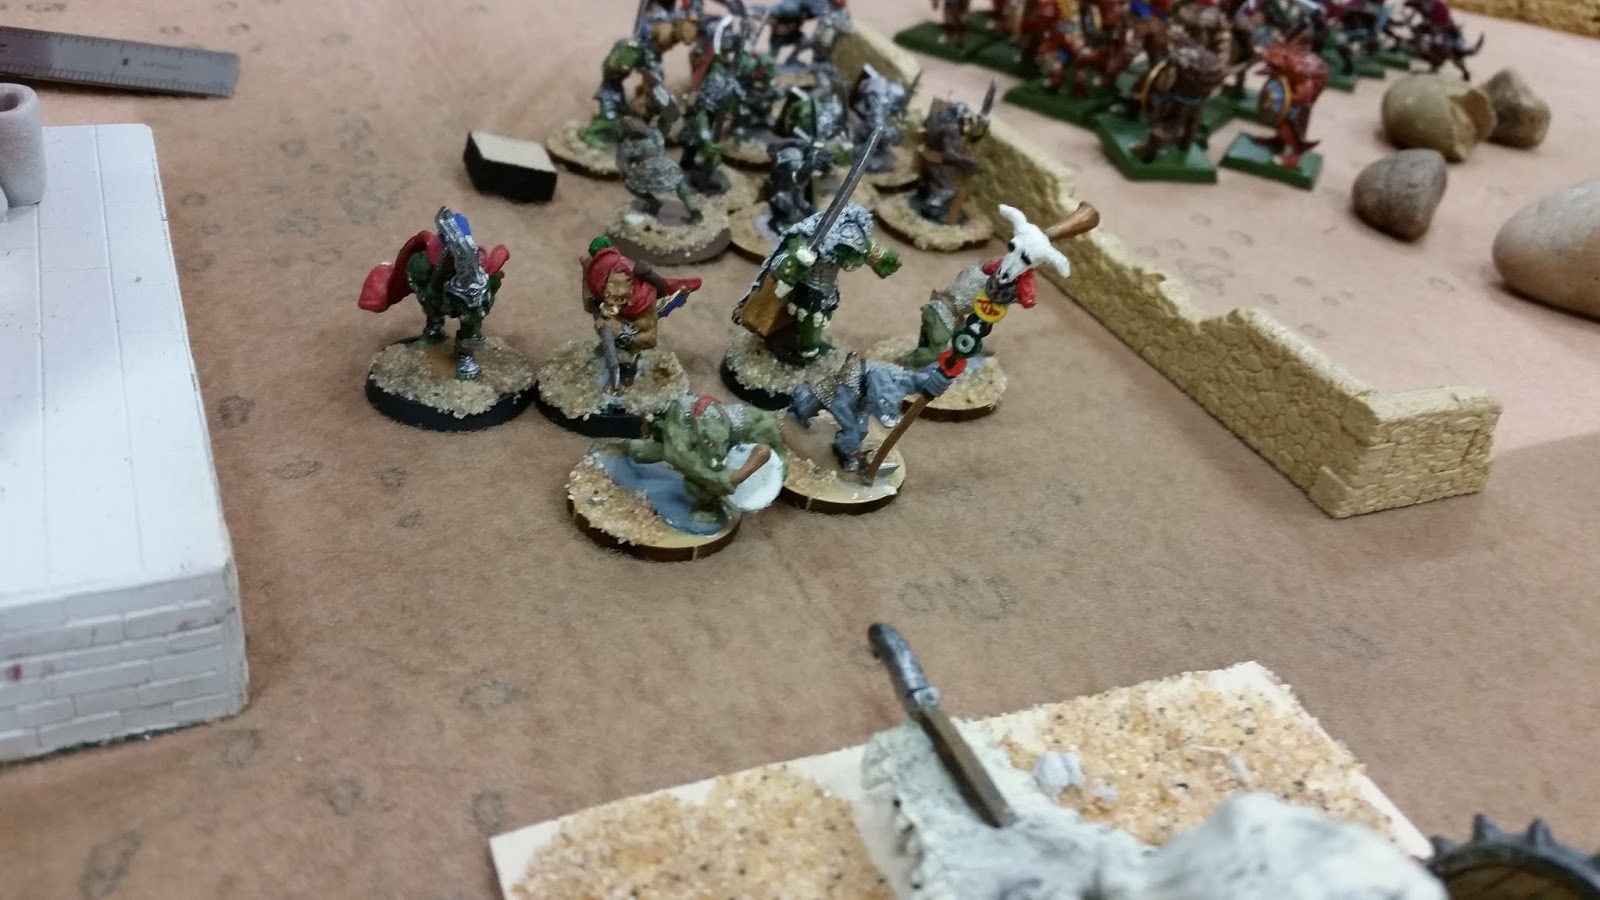
My orcs and Jim's lizardfolk spent much of the game tussling over this piece of wall.


Here is the orc chieftain rushing to take the war machine.  (spoiler alert:  they didn't succeed).


And here are the so-called 'fierce foot' just before they ran away...


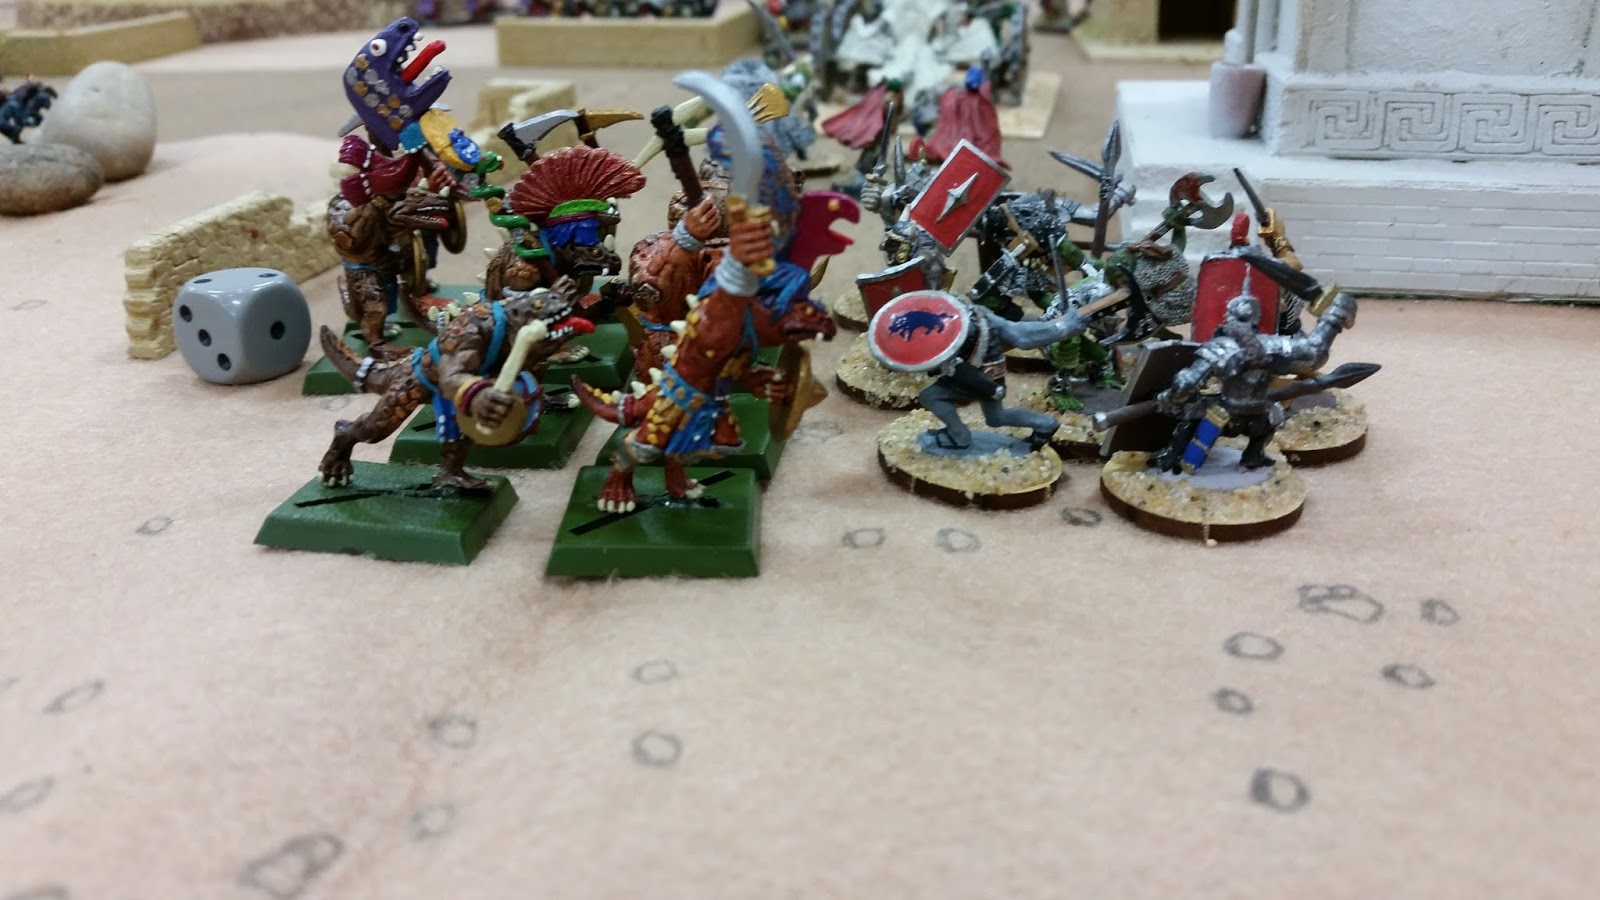
Action on the flank - the last of Doug's knights being stymied by the lizardmen.


Throughout the evening, my dice rolling was abysmal.  This is fairly typical of my rolling:  the two sixes were nice to see, but there were always far too many ones and twos!  


Case in point:  At one point, I had three battered units.  I needed to test for each to rally.  I rolled a pair of ones for the first roll, then snake eyes again for the second, then the third roll was a three (a two and a one). Had I failed a rally by a small amount, the unit would fall back and take another casualty, but for a low roll the unit would disintegrate - so I lost three units right there!

Sunday 2 July 2017

Well, that's very Hansom...

I have no particular justification for purchasing and painting this model, except that I wanted it. I had a vague idea of changing the driver into an Indian, so I could put this cab on my NWF gaming table, but that was going to be too much bother for a piece that is basically just eye candy.

So here it is in all its glory, the Hansom cab from Eureka:


Saturday 1 July 2017

More for Afghanistan and the NWF

I think I've got enough background character models for my Afghan table, but when I see something new on the Eureka website, I just can't resist.  So here are some more mules!  The mule with the fuel jerry cans is pretty much limited to modern settings but the other two can easily be cross-purposed to the 19th Century or earlier.


The set includes the two muleteers in the background: an old bloke and a kid.

But of course I can't just order one thing from Eureka, so i also got the ox cart from the Vietnam line.  After looking at photos of ox carts from India, I decided to add a bit of colour.  Still need to find a driver for the cart, as the lovely Vietnamese lady that comes with the set would be a bit out of place in Kabul.  Maybe with a bit of putty her clothes can be transformed to fit South Asia instead of Vietnam.


The cart comes with a resin model of a load of straw. I decided to paint it separately but then found out that I couldn't fit it on the cart!  It looks like it's levitating.  Maybe it will be used for smuggling...


I also found time to finish up these cheery blokes from Artizan Designs, who look ready to become Kings.  Kings in Kafiristan!  I wonder how they are going to get along?


And of course a District Commissionaire to keep an eye on them as he enjoys a cuppa.


 These casualties and medics have been waiting patiently for quite a while, but I finally have them finished.  

The medic comes with an AK, but since I wanted an unarmed medic I did my best to scrape the gun off of the one on the right.  The unarmed medic is intended to make players question their actions:  can they shoot someone who is just providing medical assistance?  


And of course they have Red Crescent badges on their medic bags!


Sunday 11 June 2017

No, I'm not actually working on WWII figures but....here's a jeep!

I like to tell myself that I am not currently trying to build a WWII army for any of the participating powers, major or minor.  I've tried in 28mm and in 15mm, and in neither case was I interested in the results.  And yet I seem to have WWII stuff in my collection, like this US Army jeep:


Wednesday 7 June 2017

Afghan artillery

Now that the Pathan tribesmen have a field gun, it's time for the Afghan army.

I started with Perry Miniatures Egyptian field gun, naively thinking it would be a good basis for an Afghan artillery piece.  One of these days, I'll learn to do research first, and then spend money.  Ah, well, live and learn 8^)

Here is the base piece:

It is a Krupp 6-pdr, and the crew are looking quite dashing with those fezzes.  Fezzes are cool.

So I went looking for information on Afghan uniforms and kit.  The best place on the web for info on the Second Anglo-Afghan War is the Mad Guru's Maiwand Day blog.  That's where I learnt that the Afghan army in 1880 had some very modern artillery in the form of Armstrong guns (d'oh!).  As I'm not about to put my flimsy modelling skills to the test by chopping up the Krupp gun, the gunners will get to keep their historically inaccurate artillery piece.  Maybe the Russians smuggled the Krupp gun to Kabul from Essen.

I also found out that fezzes are all wrong for Afghanistan.  (OK, I already knew that).  Preferred headress for Afghan artillerymen was either a brass helmet with a red horsehair plume or a forage cap with a red tuft.  Now, my lead/plastic mountain happens to include one box of the new(ish) Perry plastic British infantry for 1877-1885, and that box includes two officer heads wearing forage caps!  But of course, I have four gunners.  I considered a few options like trying to modify the fezzes into Afghan beehive hats, or wrapping turbans around them, but those efforts looked pretty crappy.  Then I hit on the brilliant idea of taking French carabinier heads.  The plume wasn't right, so I chopped that off and modelled new plumes from Procreate.  And so here is how the new Afghan artillery turned out:


Tuesday 6 June 2017

Jhamjar border skirmish

Lt Frank Ocker's mood had not improved in the weeks since his skirmish with the Jhamjaris.  His little "police action" had been a failure.  He'd lost men (both wounded and killed) and he himself had been wounded by the Jhamjar Vickers gun.  Now he was finally back on his feet, he was going to go back to the dusty little principality and teach those sepoys a lesson!

I managed to meet Kevin and Jim to get in my second game of Chain of Command: Jhamjar last Friday.  I won't carry on the narrative this time, but in my mind the foul-mouthed F. Ocker is cursing up a blue streak - which my puritan mind won't allow me to convert to the written word 8^) and Lt Singh Widj is calmly and professionally keeping his troops motivated and confident.

Based on lessons learned in the previous outing, I added more terrain this time.  In the foreground to the right there are a few rocky outcrops and a small Hindu shrine on the left.  Past the shrine there is a small orchard (surrounded by a low wall), then a small settlement consisting of a short market street and a farm compound.  Alongside the muddy creek, there are some areas of marsh grass.

We decided to rate the buildings as soft cover this time, as they aren't really fortresses, or at least to discourage us from treating them as such!  The creek is shallow and easily fordable so is rated as difficult ground.  In the photo below, you can see the Jhamjar Rifles mustering on the right, and the ANZACs of Ockerforce gathering on the left.


The table as seen from the Ockerforce side.  


A couple of shots of the market street.  The merchants have fled; this is the quiet before the action starts!


Two shots at the end of the Patrol Phase.  Ockerforce has the Union Flags, and Jhamjar the red flower.


The jump-off points have been placed.  Ockerforce has the lorries and Jhamjar has two mule carts and an elephant.


Early deployments.  A section of English troops is attempting to enter the compound, and a sniper team has deployed above the fishmonger's shop.  Meanwhile, two sections of Jhamjaris have deployed, Muslims near the compound and Sikhs (with the Havildar and a medic) in the rocks. 


Bad news for the Poms!  Just as they climb to the rooftop, the Jhamjar Vickers Gun sets up across the creek and lays down covering fire!  The Poms take three goats (aka shock points).


Pommie corporal rallies one shock from his troops and urges them to take cover (tactical marker added).  Ockerforce sniper fails to have any effect.  Another section of Muslims deploys on the Jhamjar right.


A section of Sikh riflemen maneuver around the Hindu temple.


Ockerforce kiwis (in peaked caps with havelocks) tries to balance out the Ockerforce left.  Sniper still ineffective.


 Kiwis advance to the edge of the creek and take cover in the rushes.  We know they are kiwis 'coz they have acquired a couple of sheep (two shock points).


Pommie section is engaged in a firefight with the Muslims across the compound.  The Ockerforce sergeant has arrived to rally off the shock and direct fire for the Ockers.


Sikh section has occupied the shrine.


Firefight continues...


But now the Ozzies have deployed into the orchard to confront the Sikhs!


Glamour shot of the shrine!


 Kiwis have decided to hunker down (going tactical). 


Meanwhile in the orchard, the second Sikh section has charged!  Bole So Nihal, Sat Sri Akal!  and the Australians are driven back...


and then the survivors take more fire from the shrine!  (one injured corporal and now 4 shock on the section).


So Frank Ocker deploys his last section into the orchard.  They charge and chase off the Sikhs!


While across the village, the Muslims rush in and wipe out the kiwis.


Back at the compound, Sergeant Bloggins and the Pommie Corporal are all that are left of the section.  They have collected a decent herd of shock markers, so are now pinned.


And with most of Ockerforce out of action (two sections wiped out, the other two reduced to less than half strength), we decided to call it.


This game went a lot better than the first.  I feel I learnt a few good lessons tonight (I was Frank Ocker again!).  Patrol phase was a lot better.  With a few more games it will be better still!  But this time it felt pretty balanced.  Having more terrain on the table was a bonus as it allowed better placement of the JOPs.  

The forces were not that well balanced.  I found that there's a reason the MMG is a List 4 asset!  It more than outweighs the two LMGs (Lewis Guns) in Ockerforce.  I can't really comment on the sniper.  He suffered from poor dice rolling  - never hit a thing all game!  He should succeed on a 3+ but the only time he got that Jim went and rolled a save!  So next time, more thought to balancing the forces, as well as looking at a different scenario, such as an attack/defend scenario.  I'm also ready to add some National Characteristics, to allow leaders to use their command initiatives to do things like direct fire or inspire charging into melee.

Melee is very decisive.  After mucking about with firefights for much of the evening, the melee combats we had were very decisive!  There were three of them and each pretty much wiped out the defender (although at significant cost to the attacker in some cases).

We managed to forget all about Force Morale.  There were several incidents that should have taken morale points off of Ockerforce - such as wounded NCOs and infantry sections destroyed in melee.  We got the same result in the end but it would have been good to track the effects on the fancy Force Morale boards!  We also failed to use Command Dice.  Each side earned a couple of these, but we weren't familiar enough with their use to take proper advantage.

So in the end, a good game, decisive result but a few lessons to apply for the next game.  Definitely looking forward to having another go!