Showing posts with label German. Show all posts

Monday, 7 July 2025

CoC2 - Attack and Defend in 1940 France

 Another busy gaming weekend!  After the big Jhamjar game on Friday, Craig came by today for a second try at Chain of Command second edition.  This time we played the Attack and Defend scenario, which allows for much more support.  Craig's French chose to be the attackers with 12 points of support, and my Germans downgraded to a second wave platoon, which meant that I was allowed 8 points of support (base of 6 which is half of Craig's 12, plus 2 more for the difference in force rating).  We rolled for table orientation and again found ourselves playing lengthwise, adding to the challenge for the attacker, giving him further to go on a narrower front.

Here is the table Arthur set up for us.  The French attackers enter from the top of the photo.  Designated objectives for the attackers are the ruined building on the left and the lone tree on the right, both circled in red.


The patrol phase ended up with patrol markers locked down on either side of the cemetery. The French had 4 markers (the red ones with the maple leaves - originally intended for the 1st Canadian Division in Sicily but we made do with what we have!) but Craig ended up stacking them in pairs to shut down the maneuvering, to prevent the rightmost white marker (Hermann Goering Division, also for Sicily) from swinging further right.


Jump off points are a bit boring today!  We used the brown hex markers circled in red.  I have fancier JOPs but I was a bit too disorganised to pull them out.  Note that the French markers as on the wrong side of the stream, which was rated as a minor obstacle and broken ground, a nuisance for the French but not too much!


I purchased two sections of barbed wire (6" each), and Craig generously pointed out that in V2, there is a three for two deal, so I ended up with a total of 18" of barbed wire :)  I used it to block the left side of the German defences. 


Early deployments with French and German sections on either side of the cemetery.  French are already taking shock as shown by the white counters on the 'tree' beside them.


The Germans deployed a 'shabby Nazi trick' in the form of a collaborator, who redirected French troops away from the last jump off point.


More troops deployed on the board, including the French heavy tank, a Char B2 bis.


In response to the French tank, the German infantry gun (7.5 cm le.IG) deployed.


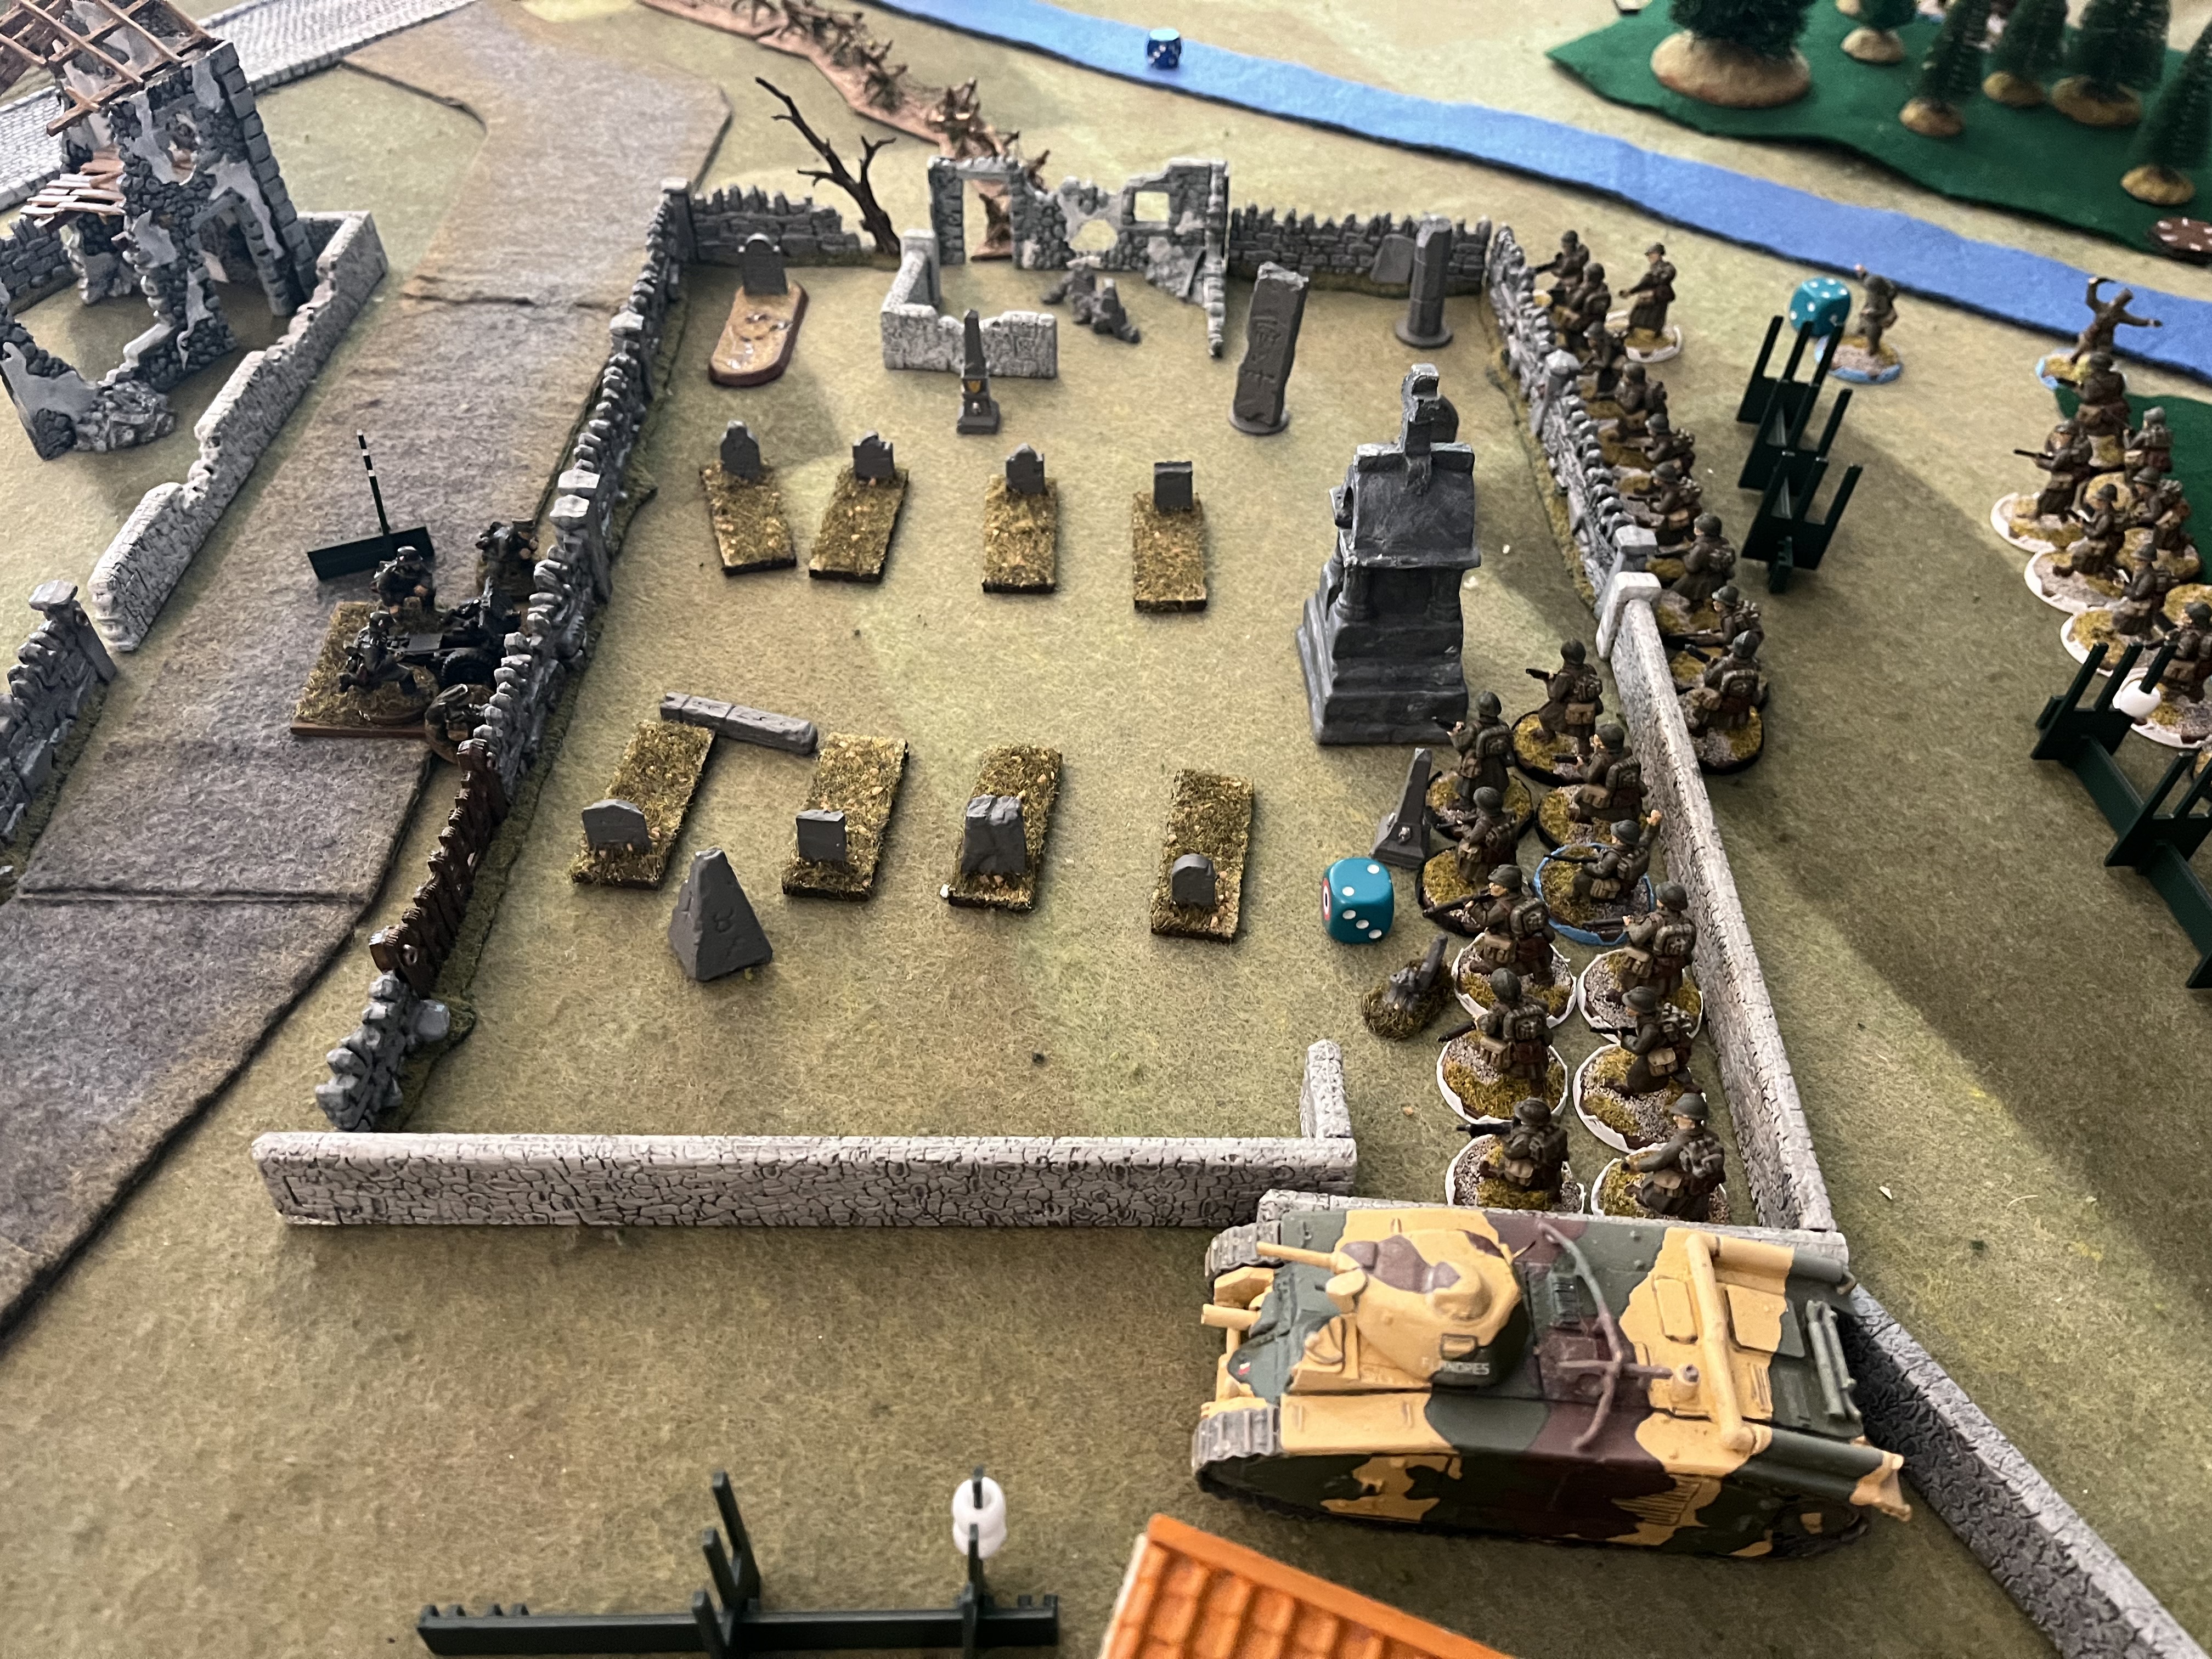
Cemetery firefight continues.  French manage to kill the German feldwebel.  It's a Bad Thing to lose a senior leader and German force morale takes a hit!


Then the Char crossed the wall and dispersed the German squad.  The rifle team hid in the small building, but the MG team was broken and fled the table.


The German section by the wall was getting shredded so they fell back to the ruins across the road, with the MG team moving to the upper floor to put fire onto the attackers.


Iggy the infantry gun is feeling a bit outnumbered.


And then the gun crew are driven off!


But then the Germans bring another section.  They cannot crew the gun, but they can lay down fire on the French!


German officer moves up to direct the fire of the MG.  His guidance allows the use of the German special trait, maschinengewehr which adds firepower dice as well as the storm of steel effect, where each '6' rolled adds another firepower die to be added, with the potential to increase firepower indefinitely as long as the firer keeps rolling 6's.


French char attempts another overrun of German infantry.


This time, however, the Germans had no shock on them and were easily able to avoid the tank, allowing them to move against the French infantry following behind the Char.


French and Germans passed tactical status back and forth.


Here is a result of a maschinengewehr roll - 10 dice initially turn into a total of 14 hits!


Germans are successful in pushing back the French past the cemetery wall.  


And the French Char struggles to turn to face the German infantry in its rear.


French officer struggles to rally his forces.  This photo is a bit deceptive, as only the French infantry on the left side of the creek are still in the game, the others are the casualties' pile! But still, there is a lot of shock that the officer needs to rally.  This was when we called the game as a stalemate. Unusually, the French were still at their initial force morale level of 10, in part due to Craig's use of Chain of Command dice to avoid FM checks, but also due to many units getting hurt, and combat effectiveness reduced, but not actually breaking.


German force morale at this point was 6, and the remaining troops were barely holding on, and they had a heavy tank in their rear.  Although the Germans had no way to hurt the tank, the tank was not able to capture the objective.  The Germans stopped the French advance by beating all the infantry and working around the tank.  If we would have played on, it's likely the French would finally have forced the German force morale to break but would not have a combat effective force left to take advantage of the result.

The game allowed us to explore more aspects of the V2 changes. Mostly we are pleased but there are a couple of things we want to look at more closely.  Storm of Steel is a nice bonus, and we remembered to use it this time.  We talked about introducing a house rule to limit the bonus to a single extra roll for each initial 6, but to not allow indefinite stacking as we had a few cascading results that seemed excessive.  We'll look at this more as we play on with these rules.  

The Red Die is very powerful.  I used it last week, and Craig had it this week.  It really gives a great benefit.  We aren't sure if we should limit it, in a similar way to how we limited Green and Elite troops in V1, or possibly to rate it to be more expensive than a 2 point cost.  Perhaps we'll come up with a house rule to limit the use of the red die.  The 1940 sourcebook requirement that you need a minimum of three support units before you can pick a red die is a good start point; we may want to clarify that further - for example, maybe require that the three supports should be a minimum of 2 points each, so that a medic or wire cutting team don't count, only supports that can take offensive action.  Another thing for us to discuss further! 

A thing that has irked me for a while, not new to V2, is that roadblocks, minefields and barbed wire have the same value, even though minefields are more difficult to deal with as they take up a bigger piece of ground and are harder and more dangerous to clear.  On the other hand, I have less experience in dealing with either, so I should play more games where they are involved before taking too strong of a stance.  Barbed wire worked to my advantage in this game since it pushed Craig to concentrate on the other side of the table.


Sunday, 8 June 2025

Battle for Husiatyn - WWI Eastern Front

 Lisa, Arthur and I played scenario 6 from the historical campaign she's preparing based on the service of the Royal Navy's Armoured Car Expeditionary Force on the Eastern Front in 1917.  Today's game is based on action at Husiatyn in Galicia.  The Russians and their British allies want to stop the Germans from crossing the bridge and capturing the town.

We used Fistful of Lead Bigger Battles for this game, same as with the others in this series.

Russians and Brits start on the road across the top of the photo, and the Germans on the lower side of the photo.  Germans want to cross the river, which can be done at the bridge at regular speed or they can wade the river, treating it as difficult terrain. The airplane represents an observation balloon, which the Germans can use to call off-board artillery strikes.  The observer called in shots turn after turn until late in the game, when the Pierce-Arrow armoured car finally knocked it out of the sky.


The day was a foggy one, so every turn a die is rolled to see if the fog settles in, restricting vision to half range.  If it is already foggy, then a test is made to see if the fog lifts.  The fog came in early in the game, which allowed the forces to advance unhindered by their opponent's actions.

Here the German MG has crossed the bridge, but had to deploy quickly, without taking cover, to respond to the Lanchester AC that appeared through the mist.


Other German forces attempted to wade through the river. The two-man sniper team was eliminated by Russian and British fire before it was able to get into position.


In a rare occurrence, the German flamethrower team was able to fire its weapon, at its extreme range.  They only had minimal effect, adding a single point of shock onto the Lanchester. The car immediately returned fire and wiped out the flamethrower.


A firefight developed, between the MG, infantry and two British cars.


My photography was a bit off here - the Russian cavalry charged and eliminated a German infantry unit, and were then driven off by rifle fire from another unit. 


As the Russian cavalry regroups, an infantry unit moves to keep the pressure on the Germans.


After the Germans wading across the river were defeated, the focus turned to the remaining forces at the end of the bridge.  The smoke puff represent shock.


Russian infantry quite sensibly use the Rolls Royce as cover,


Only to be dismayed as the car is taken out by an off-board artillery strike!


Meanwhile the Russian cavalry regrouped, then charged and wiped out an infantry unit and the MG that was adjacent to it.


Glamour shot of the Russian infantry.


Victorious Russian cavalry!


RNAS Pierce-Arrow Armoured Lorry.  This was quite a beast, porting around a 3" QF field gun.


Thanks, Lisa, for writing a great scenario pack.  Looking forward to playtesting the final scenario soon!

Monday, 17 February 2025

Bolt Action - WWI Eastern Front

 We picked up the new (3rd) edition of Bolt Action for Christmas and this weekend we finally managed a game.  I say "we" but this game was all due to Arthur's planning.  Arthur made a couple of 500-point lists, and built the scenario using info from the main rulebook.  Arthur's main change was to use early WWI armies rather than WWII.  The Russian army had three groups of 12 regular infantry, a squad of 5 cavalry, a Maxim MMG, a nurse and an officer, while the Germans had three groups of 10 infantry, 10 Uhlans, a field gun and a command group.  Here's a snap of the German force, and of course I didn't get one of the Russians!


We invited Sam and Doug to join us.  Sam is our Bolt Action expert, and took on the referee role to make sure we got up to speed with rules changes for the new edition.  This was Doug's first BA game, and he took the Germans to learn the rules on the fly.  Arthur took the Russians and I managed the refreshments.

Arthur rolled for terrain and ended up with this.


As Arthur won the dice roll for choice of deployment, he chose to deploy in the village in the upper right, leaving the Germans to deploy in the open ground in the lower left.  It's not quite as bad as it looks for the Germans as there are a few hills that created a few areas of dead ground that they could exploit, but the openness certainly gave the Germans motivation to get moving.

The first Russian infantry squad set up in the village, in cover behind the stone wall.  I didn't have any markers for 'hidden' so we used 'overwatch' markers instead.  In the background you can see my DIY BA order dice!  The Maxim gun is just barely visible at the right end of the stone wall.


Germans deploy, ready to advance quickly on the Russian positions.


The German field gun deploys on a hill in the table corner where it can blast just about any target on the table.

The scenario starts with a bombardment, which means that most units on the table begin the game with shock markers.  This meant that each unit needed to pass a command roll before it could act, with the unfortunate result that the Uhlans were stuck for a couple of turns before they passed an order check!


To win the scenario, each player wins points for both destroying their opponents' units as well as occupying table quarters.  Here a Russian squad advances into one of the neutral table quarters, but note also the small forest of shock markers it's earned from German fire.  The nurse in the background was able to help save casualties from time to time but not the shock markers.


The Russians took a turn to rally, and were able to shake off the shock markers.  The German field gun kept bashing them, though, and managed to destroy this squad.

Elsewhere the German advance in the centre failed.


Action instead moved to the lower right table quarter with a standoff between Russian and German cavalry.


Alas, the grand cavalry battle never happened.  The German Uhans took too many shock markers, and then rolled poorly on a morale check and fled the table.  We did see the Russian cavalry successfully charge the German infantry.


Much bloodshed happened, the Russians depleted the Germans but were wiped out in the charge.

Bolt Action scenarios mostly have a limit of 6 turns.  The result was after six turns, each side had eliminated 3 of the opposing sides forces (out of an original 6 for the Germans and 7 for the Russians).  However, the Germans had active units in their own original quarter plus the two neutral quarters, while the Russians were only in their own quarter.  This result gave the Germans the win with 5 points to 3.  Doug appreciated his Pyrrhic victory.  Despite losing, Arthur still appreciated the game.  Thanks Sam for keeping the game on track and evaluating the rules for us!

Playing with WWI forces still gave a good game even though the rules are written for WWII.  After all, these forces are pretty similar, they just have fewer troop types to select from.

Sunday, 13 October 2024

Yashka and the Brides of Death

 Lisa and I played the fourth and final scenario featuring Maria 'Yashka' Bochkareva from the TFL Empire to Revolution supplement for Through the Mud and the Blood.  Yashka has taken the lessons learned from her time as an enlisted soldier, and now leads the Women's Battalion of Death.  The scenario is based on an attack by the WDB on German trenches.  They are supported by a unit of Russian officers, as the mutinous, proto-revolutionary enlisted Russian soldiers had refused to assist.

Both sides deployed on blinds (represented by the national flags) - Germans in their trenches and Russians advancing from their table edge.


Although it is daytime, units must still be spotted before they can be fired upon.  The Russians used their spotting efforts to assess the damage to the wire.  The dice indicate the status of the wire, from 4 (impassable) to destroyed (removed). The Germans have started to spot Russian units, and have deployed so they can open fire on them.


Russian officers shelter in a shell hole, while shock accumulates.


Meanwhile, Yashka keeps her troops motivated as they keep up fire on the German MG position.


The fire is amazingly effective, the MG is reduced to a single crewman.


As I carefully read the rulebook to find out if the German officer could transfer soldiers to support the MG, Russian fire finished off the remaining machine gunner.


Women's Battalion cross the wire but take shock as German rifles fire on them.


Despite their shock from being fired upon, the Women charge the Germans and drive them from their trench!


The remaining Russians move up to clear the remaining German trenches.


Through a judicial use of the 'Urrah!' card, three sections of Russians combine to charge the last Germans.


The attack is a success, and the surviving Germans are captured.


The series of games with M&B gave a good intro to the rules.  There was a mix of trenches and open terrain.  Card activation went well, but a lesson learned was to make it really clear what each card represents, especially for the 'special' cards.  I liked using blinds, as it allowed troops to move around quickly before being spotted, so the early game moves faster and the action kicks off when the forces are closer to each other.  That said, I can also see how game development has moved on since 2009 when these rules were first published, and I'm looking forward to the new version of WWI Chain of Command that Alex 'Storm of Steel' Southern is working on!