We set up the table, with a gravel track forming the axis for the Canadian advance. There are some hills breaking up the terrain, although those do not show up easily in these photos. A small, walled farm is located where the trail crosses the main road.
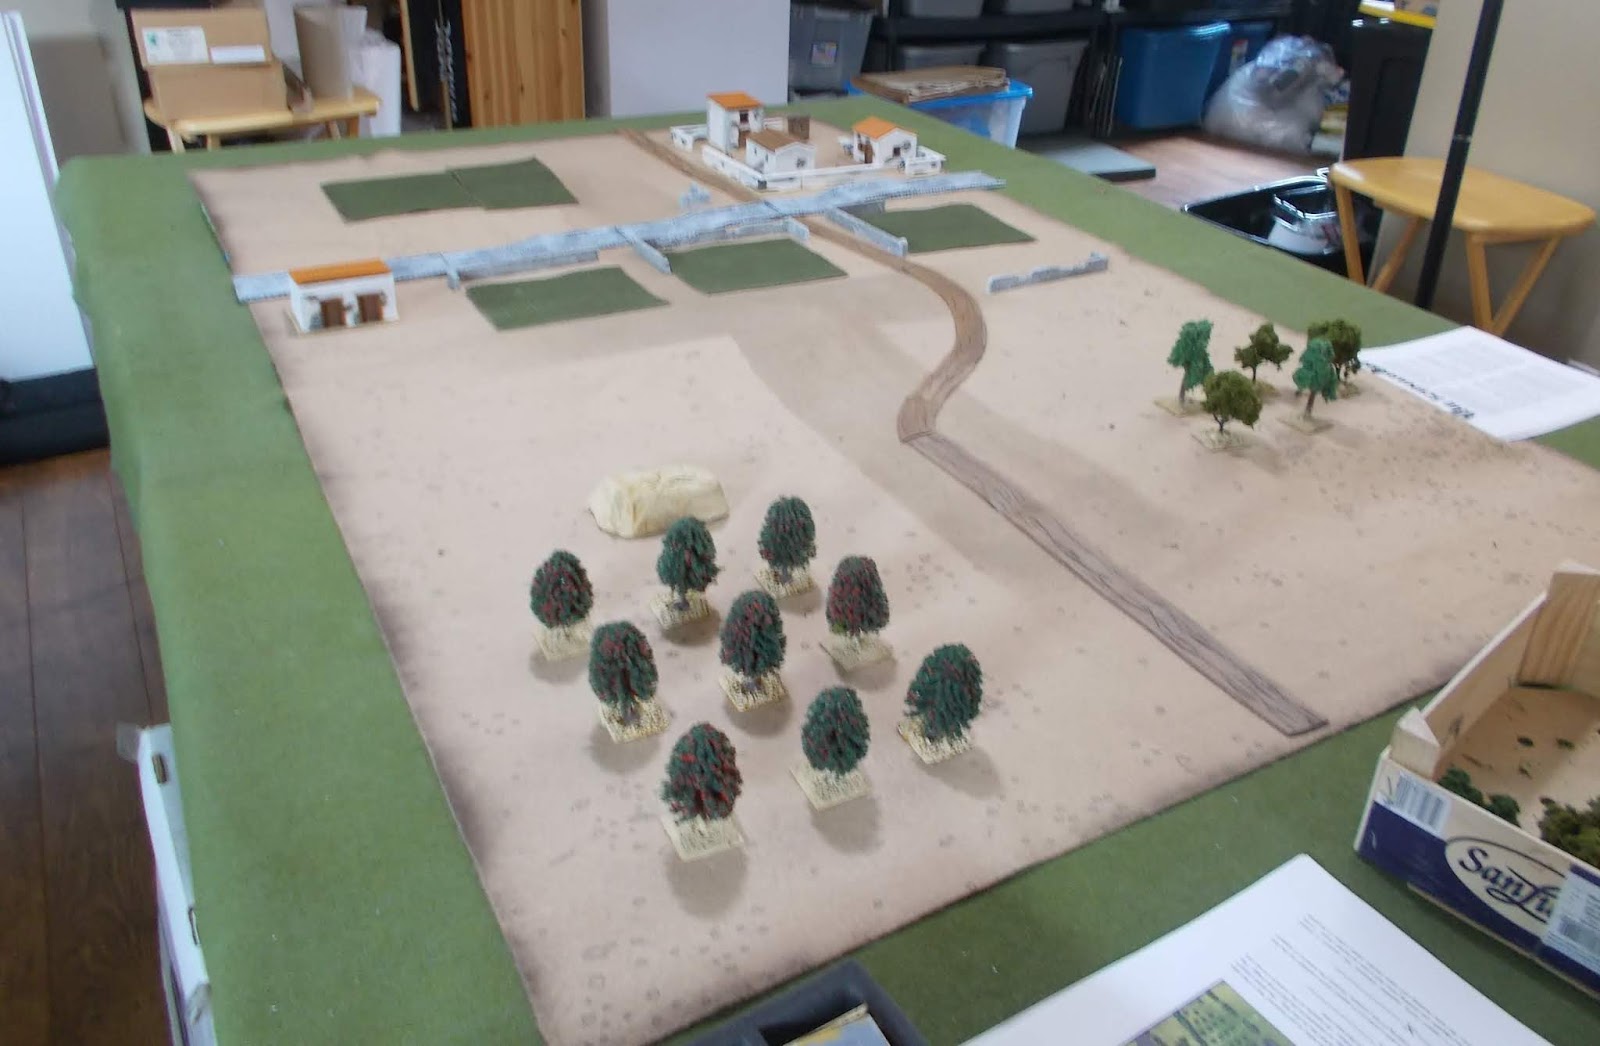


Doug explained the situation. It is 10 July 1943. 1st Canadian Division has successfully landed on Sicily near Pachino and was advancing inland to secure their first day objectives. My platoon's objective for the day, as Doug informed me, was to advance and secure the crossroads.
We played this as 'The Probe' scenario. As the attacker, I rolled 1d6 for support, earning a miserable 2 points. I still had no clear idea of what sort of opposition I could expect. So we proceeded to the Patrol Phase. But first we spent a bit of time reviewing the order in which things are supposed to happen, where we realised that the force support roll was supposed to happen after the Patrol Phase! As we tried to get things back on track, we rolled for initial Force Morale, mine was the lowest possible start point of 8, and Doug started with a slightly better 9.

Neither Doug nor I are really comfortable with the Patrol Phase yet, so this was good practice for us. I think we got the mechanics right, and we ended up spread across the board like this (while I was busy thinking that I need to get more terrain set out next time I play this game!). Doug showed me his new Patrol Markers - the fasces symbols confirming my suspicion that my troops would be facing some Italian opposition (although not Don Corleone and his famiglia, which was what I had been teasing Doug about, to his growing annoyance).

Demonstration photo, showing how to determine the area in which the Jump Off Point can be deployed. Draw a pair of lines from the two nearest enemy PM through your own PM, and the JOP can be placed within the triangle formed. (as long as it's at least 6" back and within or behind cover).

The Italian JOP are visible here, two up front behind the low walls, and one further back, right at the board edge.

Canadian JOP are located within the orchards, one in the olive grove on the hill (lower) and one in the apple orchard and one behind the big rock (upper).

What's happening in the farm? Music? Some sort of celebration?

Antonio the grocer is explaining something to old Nona, but why is he so cheery?

The dancers and musicians are having a good day as well, to the annoyance of Signora Moglie della Fattoria.


And now at last we are ready to start the game. The Italians reveal that they have laid barbed wire to block the advance along the road. I also revealed how I spent my two points of support: on a pre-game barrage! I then found that I wasn't supposed to take a barrage for this particular scenario, but Doug allowed it - much to his disadvantage, as it turned out!

Doug had the first phase, where he got quite lucky and rolled a pair of 6's, giving himself a double phase! It was somewhat wasted, as he didn't want to reveal his hand too early. But as he discovered, the barrage I'd called meant that he needed to check for deployment of each gruppo de combatte, and they would only arrived on a 4-6. Doug being famous for unfortunate dice results, this meant that more than half the time his troops would fail to deploy.
However, I got to finally see my opponents: fascist blackshirts!

Doug had been very busy, building entrenchments and fabricating these figures to face mine! They are assembled from the torsos of US soldiers, with Zouave heads to represent the famous blackshirt uniform.

Doug was concerned that his troops could only fight from their trenches, as they only had torsos. Moving around outside the trenches would be very difficult without legs!

I was cautioned against looking too closely at their weapons, as a few of them were carrying muskets...
Here is what the blackshirt uniform looked like. I think Doug did a fantastic job bringing these troops to the table, especially as they were completely built from leftovers from his bits box!

Doug had decided to deploy to the right of the farm, right where I'd decided to advance - partly because of the barbed wire limiting my ability to advance, but also because I feared a dug in enemy in the farm (it was undefended, as things turned out, but I didn't know that!).

Italians deployed:

Canadians advance tactically - hence the markers ;^)

2 Section and 3 Section move up to support 1 Section, while the 2" mortar does what it does best: lay smoke!


1 Section lays down fire on the defenders while their comrades move up in support. The firefight is not balanced - the Italians are entrenched, while the Canucks are in the open, but being green makes them far more vulnerable than the well-trained Canadians.


More smoke! We understand the rules for smoke better now, which means that it doesn't always go where I want it. Over a number of phases, however, I am able to establish a pretty good smokescreen blocking line of sight for the defenders closer to the crossroads.

The little red cross marker shows that the Italian caporale is wounded, and out of action until turn end (turn end being a major frustration for Doug - he wanted a turn end to clear the smoke and allow his injured NCO to recover!). The dots are shock markers, and you can see that the blackshirts have accumulated many of those as well. Canadians are following the book here - 1 Section lays down fire to suppress the enemy, while 2 section maneuvers into position to assault.

2 Section storms the first trench, and the blackshirts rout (I had more than 4:1 advantage in close combat dice, as the Italians were pinned, caporale was out of action, and they had suffered casualties). I should have also occupied their position, but I didn't. That was a missed opportunity, as I could have then followed up to attack the other defenders or take the JOP. Lesson learned for next time!

The Italian sergente (an inferior senior leader) had by this time moved to direct the LMG team.

3 Section then advanced toward the trenches of the other gruppo.

Red stick helping to check who has line of sight on the attackers.

This assault was not so well advised: the Canadians had the advantage, but it was not as overwhelming as the earlier assault. These Italians were led by their tenente as their caporale had been killed.


Meanwhile, 2 Section followed up with an assault on the sergente and the LMG team.

The after-effect of 3 Section's assault - many more Canadian casualties, plus shock (the sheep are shock markers). I only carried out this assault as it was getting late, and I wanted to wrap things up. The game wasn't quite over, as Doug's Force Morale was still not zero (I think he was down to 3), but his only remaining forces were a single LMG team toward the rear of the table, and I was about to capture two of his three JOP. Once I'd captured those, the blackshirts would be broken.


Doug explained to me his side of the story. The Blackshirts were assigned to hold the crossroads, with Germans holding the farm. Once the blackshirts had dug in, however, the Germans pulled back to their next hold point - the departure of the despised tedeschi being the reason for the celebration at the Sicilian farm! Green troops have a big disadvantage in this game - even though the Italians were dug in to good entrenchments, my regulars were able to best them in the firefight, and the extra dice I got in assaults against green troops also made a big difference. The 4 command dice (compared to my 5) were also a big difference - Doug didn't get the magic 5s that were needed to get the CoC die to end the turn, didn't get so many multiple phases, and generally had fewer options to act.
The game was educational for me. Looking forward to the Canadians' next encounter as they continue their advance across Sicily. For Doug's perspective on this battle, check out his blog here: https://dotsofpaint.blogspot.com/2020/05/my-new-italian-ww2-camicie-nere.html