Showing posts with label Bolt Action. Show all posts

Monday, 17 February 2025

Bolt Action - WWI Eastern Front

 We picked up the new (3rd) edition of Bolt Action for Christmas and this weekend we finally managed a game.  I say "we" but this game was all due to Arthur's planning.  Arthur made a couple of 500-point lists, and built the scenario using info from the main rulebook.  Arthur's main change was to use early WWI armies rather than WWII.  The Russian army had three groups of 12 regular infantry, a squad of 5 cavalry, a Maxim MMG, a nurse and an officer, while the Germans had three groups of 10 infantry, 10 Uhlans, a field gun and a command group.  Here's a snap of the German force, and of course I didn't get one of the Russians!


We invited Sam and Doug to join us.  Sam is our Bolt Action expert, and took on the referee role to make sure we got up to speed with rules changes for the new edition.  This was Doug's first BA game, and he took the Germans to learn the rules on the fly.  Arthur took the Russians and I managed the refreshments.

Arthur rolled for terrain and ended up with this.


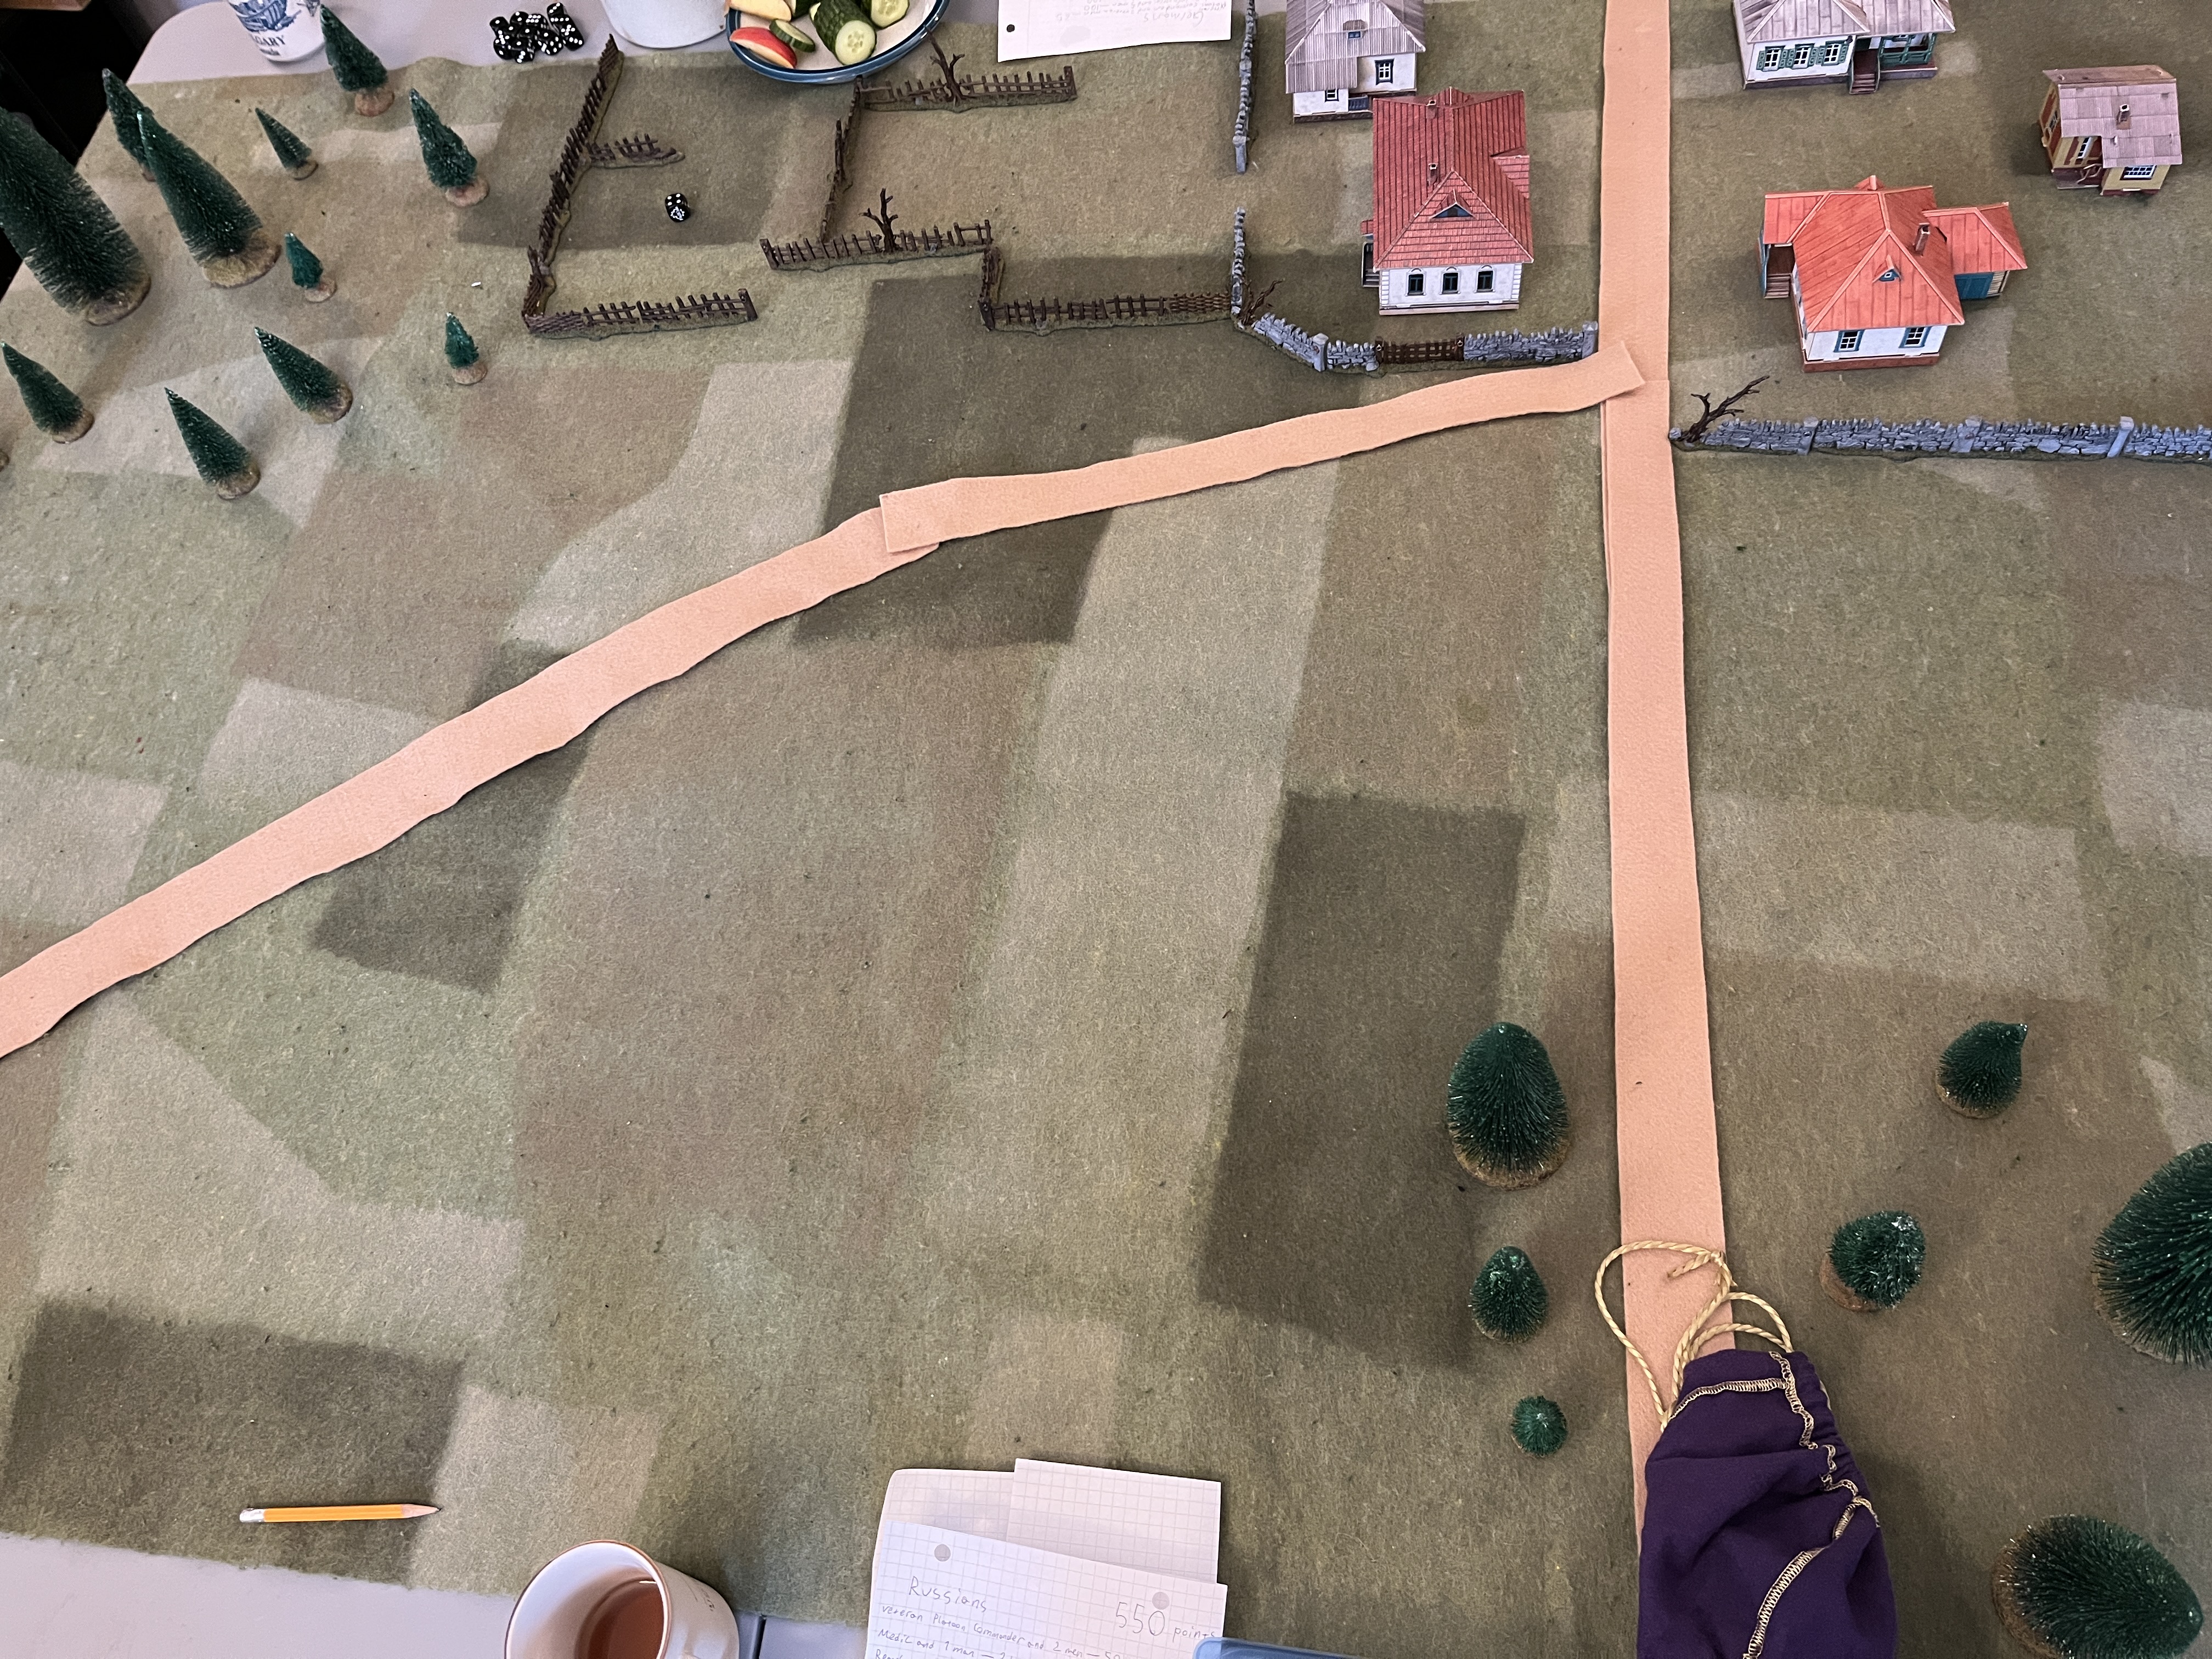
As Arthur won the dice roll for choice of deployment, he chose to deploy in the village in the upper right, leaving the Germans to deploy in the open ground in the lower left.  It's not quite as bad as it looks for the Germans as there are a few hills that created a few areas of dead ground that they could exploit, but the openness certainly gave the Germans motivation to get moving.

The first Russian infantry squad set up in the village, in cover behind the stone wall.  I didn't have any markers for 'hidden' so we used 'overwatch' markers instead.  In the background you can see my DIY BA order dice!  The Maxim gun is just barely visible at the right end of the stone wall.


Germans deploy, ready to advance quickly on the Russian positions.


The German field gun deploys on a hill in the table corner where it can blast just about any target on the table.

The scenario starts with a bombardment, which means that most units on the table begin the game with shock markers.  This meant that each unit needed to pass a command roll before it could act, with the unfortunate result that the Uhlans were stuck for a couple of turns before they passed an order check!


To win the scenario, each player wins points for both destroying their opponents' units as well as occupying table quarters.  Here a Russian squad advances into one of the neutral table quarters, but note also the small forest of shock markers it's earned from German fire.  The nurse in the background was able to help save casualties from time to time but not the shock markers.


The Russians took a turn to rally, and were able to shake off the shock markers.  The German field gun kept bashing them, though, and managed to destroy this squad.

Elsewhere the German advance in the centre failed.


Action instead moved to the lower right table quarter with a standoff between Russian and German cavalry.


Alas, the grand cavalry battle never happened.  The German Uhans took too many shock markers, and then rolled poorly on a morale check and fled the table.  We did see the Russian cavalry successfully charge the German infantry.


Much bloodshed happened, the Russians depleted the Germans but were wiped out in the charge.

Bolt Action scenarios mostly have a limit of 6 turns.  The result was after six turns, each side had eliminated 3 of the opposing sides forces (out of an original 6 for the Germans and 7 for the Russians).  However, the Germans had active units in their own original quarter plus the two neutral quarters, while the Russians were only in their own quarter.  This result gave the Germans the win with 5 points to 3.  Doug appreciated his Pyrrhic victory.  Despite losing, Arthur still appreciated the game.  Thanks Sam for keeping the game on track and evaluating the rules for us!

Playing with WWI forces still gave a good game even though the rules are written for WWII.  After all, these forces are pretty similar, they just have fewer troop types to select from.

Saturday, 19 October 2024

Bolt Action Stalingrad - God of War scenario

 Lisa's Bolt Action Stalingrad campaign is pretty much done, but as a completionist, she wants to finish up the remaining scenarios in the book.  So last night we played the God of War scenario.  The Red Army has launched Operation Uranus, and for the purposes of our battle, an outnumbered German platoon (officially Romanian, but you gotta go with the forces available!) tries to hold back two Red Army platoons, one infantry and one armoured.  The Germans have the advantage of some pretty significant defences, but will it be enough to allow them to hold the line?

My JTFM trenches have been getting some good use in recent games, and I was pleased that I could finally use my German bunker as well.


Arthur was so excited to field his Soviet naval infantry, so decided he needed to dress the part!  In fact, his platoon was pretty diverse and included naval infantry, a squad of partisans, the ever-popular SMG squad, the obligatory free inexperienced rifle squad, and, for the first time in action, the quad Maxim machine gun mounted on a GAZ AAA truck!


The German tripod mounted MG inside the bunker in the centre is nearly immune to the firepower the Red Army can bring to bear, but the crew can still be suppressed.  The red disks are pins that it is accumulating from the fire being brought to bear on it.  You can see that the German defences also included barbed wire and minefields.  These did not slow down the Russian advance but did channel their attack somewhat.


The Red Army has a lend-lease M4, known in Soviet service as the Em-Cha!  I teased Lisa that it showed up with a British crew and markings :)


Red Army T-26 flamethrower tank shows that there is one significant exception to the German bunkers near invulnerability!


German defender with a WWI-era MG08 machine gun tries to hold the line.


Communist-allied Brigata Garibaldi partisans prepare to assault the German trench.  Their allies, the inexperienced riflemen, have already been wiped out!


German defenders defenders are barely holding on, but they repulse the partisans!


Red Army armour overruns the veteran Panzergrenadiers.  They should have been ready, but whiffed their tank terror save and fled from the oncoming metal behemoths.  The German front line folded and move the emphasis to the second line.


My German 88 was another unit making a long-delayed tabletop debut.  It was pretty fearsome at first, eliminating a Russian howitzer with its first shot, but then later struggled to hit anything for the rest of the game.  The army list only allowed the Germans a single artillery piece, so I wanted to be certain they had the best.  With a range that covers the entire tabletop, ability to use direct or indirect fire, a ferocious armour-piercing power, and a large crew that allows it to keep operating after taking several hits, this was worth the points.  Or it would have been if I could have made a few more decent rolls to hit!


But ultimately, it too was taken out!


The Red Army flamethrower tank turned its attention on the German officer hiding in the big bunker, and that was pretty much the end of resistance.  The Red Army triumphs!


Saturday, 11 May 2024

Bolt Action Stalingrad

 Last night, Lisa, Sam and Gord came over to play the next scenario in Lisa's ambitious Bolt Action Stalingrad campaign.  The game was Scenario 16 - Lyudnikov's Island, defence of the Barrikady Factory, November 1942.  Arthur (with support from Gord) commanded the Red Army forces defending the factory against a German assault commanded by Sam, and I led the other German force tasked with holding off Lisa's Soviet relief force.

Here's the table - Arthur's force defended the upper left, while Lisa's reinforcements came in from the right.


German Shtrafbattalion deploys.


German pioneers.


Brand new Soviet conscripts hunker down in a ruined house as the German Panzer III passes on the other side of the wall.


German pioneers advance.


Maxim gun covers the approaches to the Barrikady factory.


The surprisingly effective Red Army anti-tank rifle team.


Flame-throwing T-34 comes on the table.  This beast wiped out a squad of my infantry in a single blast!


These were the green Russian conscripts that wiped out my other squad of German regular infantry, also in the first turn.  The first turn for me was unnerving, as all my regular forces were wiped out, leaving only my 'specialists' (pioneers, MMG, infantry gun, 2 cm mortar and a Panzer III).  I thought I was done!


Big yellow turn counting die on the roof of the building.  Heavy action at the far end of the table, but I was focussed on stopping the Red Army reinforcements.


Pioneers hold off the Soviet attackers inside the ruined warehouse.  They lost their flamethrower with a particularly effective shot early in the game, making it yet another game where the poor fellow was taken out before getting a shot off!


Here is one of my heroes of the game: having previously taken out the T-34, the Pz  III is about to gun down the Soviet squad.


A Russian squad attempted to flank my defenders, but ended up pinned by my MMG team.


Fierce action in front of the Barrikady factory!


Having taken out the Soviet MMG and one of the infantry squad, the PzIII attacked into the building.  The die shows that the Soviet medium mortar has zeroed in on it, so it is getting ready to move out of the line of fire.


Fierce firefight between Soviet airborne SMG squad and the German pioneers.


Soviet veterans defeat the German pioneers in desperate hand to hand combat.


German MMG provides covering fire for the attack on the Barrikady factory.


PzIII burst through the warehouse and was ready to attack the pinned Soviet rifle squad, but the game ended before this plan could be enacted!


At game end, the firefight between the Soviets and Germans at the warehouse was still unresolved. The German medic had turned out to be surprisingly effective, cancelling several casualties caused by the Soviets.


At the Barrikady factory, the Soviet veterans still held the building.  The German panzer has been immobilised by the Soviet ATR.  This photo looks bad for the Soviets, but...


the panzer has exposed it's weaker flank armour to the ATR team!


The game came to an end at this point.  It was a very bloody game, with significant casualties on both sides.  Although the reinforcements failed to break through the German lines, the Red army was deemed to be the winners as the defenders had held on to the Barrikady.


Sunday, 7 May 2023

Bolt Action Sea Lion - Airfield Defence

 On Friday I brought my 1940 Highlanders to participate in Lisa's Bolt Action Sea Lion campaign.  Fortunately I also brought my 1940 Germans, which stood in as fallschirmjagers under John's control. The scenario had my Highlanders organised as an airfield defence platoon who were required to protect RAF Lympne from a raid by German paras.

This was my first proper game of Bolt Action:  I'd had a playthrough a few years ago with my Jhamjar armies, but this was the first time with 'proper' forces and some guidance from experienced players.

The game started with most of my platoon dispersed around the airstrip, using a few bunkers for defence, waiting for an attack which could come from any direction.  I had a Rolls Royce armoured car and a section of Royal Navy armed sailors off table in reserve.  The Germans rallied their paras off table, and came on to the table from the southwest.

As the Germans came on, my Vickers MG was able to lay on some fire, but it was rapidly flanked and wiped out.  A section of infantry lay down fire from across the airstrip, and kept the Germans occupied while the rest of the platoon moved down the airstrip to engage the enemy.  The reserves came on as well, the Roller being very effective at suppressing the Germans.


Here we see the Germans coming on around the Quonset huts while the Highlanders opposite lay down fire.  To the upper right, another section of Highlanders is starting to react - they waited to see if any more Germans were coming in elsewhere before leaving their position to take on the force coming in to their left.


The Highlanders in the foreground are bravely holding and laying down fire as their mates come along to help them out.  As inexperienced troops, they took casualties pretty every time the Germans fired on them, but they hung on!  Meanwhile, the Germans were veterans and very difficult to kill, but I just kept on piling on firepower so they were too busy rallying off the pins to break out of their positions.


The Rolls Royce has arrived, and is laying down fire on the Germans to its front.

The balance of the Highlanders advance, using the aircraft on the airstrip for cover.


The RN armed sailors have arrived, taking the pressure off the remnants of the Highlander section (now down to just the Bren gun and loader).

This was pretty much the end of the action.  The Germans are falling back, but still control one of the objectives, the Quonset with the green pawn.


  The Highlanders were pleased to have chased away the Germans, but unfortunately for the British forces, the Germans enjoyed greater success elsewhere.  Of the three Sea Lion campaign games on Friday, two went to the Germans, with the Highlanders' success at RAF Lympne being the exception.