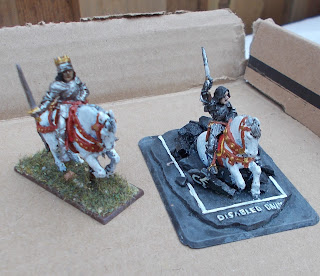
Craig, Doug and Gord stopped by on the holiday Monday to try a game of Chain of Command on my BSC2021 game boards. Thanks to Doug for contributing some photos to this report!
To shake things up, I teamed up with Gord to play as the HG PanzerGrenadiers as the attackers, while Doug and Craig set the Canadians to defend. The scenario selected was 'Flank Attack'.
To allow for a full 4'x6' table, I purchased another couple more floor tiles. For these ones, I left the extra treatment to an absolute minimum, just a thin layer of plaster and a couple coats of paint (yellow ochre base, dry brushed with Camel). Eventually I may add some static grass and other vegetation, but for this game it was enough to cover them with other terrain - the village and some plowed fields.
What's going on here? It must be market day!
Lots of lovely scatter terrain!
But then gunfire is heard and the civilians run for shelter.
Most of the JOP (Jump Off Points) are small, but here you can see the mule cart in the orchard that represents one of the Canadian JOP. The two bicycles in front of the church represent another JOP, and there is a German JOP tucked beside the minefield behind the church. That minefield was placed by the Canadian defenders to limit the space available for the German attack! The two strips of barbed wire represent another minefield.
These two trucks represent a couple of German JOP. The PanzerGrenadiers advanced as far as they could in their vehicles, then dismounted to advance the rest of the way on foot!
Barely visible under the bridge, the Germans begin their advance through the heavy brush.
Canadian section deploys in the orchard.
The defenders strike: the white smoke shows where a ranging shot from the mortar battery has landed. Right on target!
Knowing that the Canadian mortar battery has their range, the PG hustle away from the danger zone!
Back in the village, the Canadian FOO is joined by an infantry section in the church.
They are about to engage with a gruppe of panzergrenadiers across the minefields!
The mortar bombardment begins, pinning one of the German gruppe and catching part of the other gruppe.
Shortly afterwards, the FOO adjusts the barrage to pin the lead gruppe as well. And so they remained for many, many phases, as the barrage continued and all the panzergrenadiers could do was hunker down and endure it.
Just outside of the barrage area of effect, the Canadians are ready to pick off any Germans that escape the barrage.
At the other end of the battlefield, the Germans deployed another gruppe and put pressure on the Canadians in the church.
Here you can see Craig pulling more shock markers from the tub. One thing about CoC, you can never have too many shock markers! As a change from my habit of using livestock, for this game we used the 'helmet on rifle' markers from Warlord Games.
A brisk firefight continues. The Germans are taking some shock, but have brought their feldwebel into the game to ensure that the troops remaining motivated. They've laid smoke to block fire from the orchard to the left, and with two MG 42 machineguns are steadily winning the firefight with the Canucks in the church.
The Canadians drop smoke to block the German MG fire. Elsewhere, the mortar barrage has ended, and the two gruppe there dust themselves off and continue their advance.
It was about here that the game petered out. The firepower of the German panzergrenadiers was too much for the Canadian defenders. The mortar barrage was very effective at pinning half the German force for much of the game. The Germans were not blessed with the command rolls they needed - they accumulated their command points slowly, and when they finally had enough to earn a Chain of Command point to end the turn, the Canadians simply played their CoC die to continue the barrage.
Finally, the Canadians rolled the infamous triple 6 to end the turn, and with it their barrage and smoke. The Germans under the barrage only held out because they had their leutnant (SL) with them to rally shock. Their numbers were reduced by the bombardment, but in the end they withstood the barrage. But while under the barrage, their advance was halted. A valuable lesson learned about the dangers of bunching up, so that two gruppe were caught in the same barrage.
Some thoughts on CoC: Panzergrenadiers are deadly. It's a big challenge to find a way to overcome the firepower they bring with those belt-fed MGs. The barrage was a good start to trap the PG, but the firefight at the other end of the table was very unbalanced. I think one of the answers, at least for Commonwealth armies, is to use the 2" mortar to lay smoke and force the PG to relocate: when they are moving, they aren't shooting.
We had a few questions about interpreting the rules. There were a few things that didn't seem natural, so I think we may need to discuss them and decide on house rules for when the rules seem to defy common sense. Some possible rules modifications to consider:
1. If an infantry LMG team is reduced to just the gunner, the JL should be able to join him and act as loader to keep the full set of fire dice. (if the rifle team is still around, the JL could assign one or more riflemen to be gunners, but in case of necessity, he should be able to load).
2. (This if from last week's game, which I may eventually write up!) Universal carriers are not mini-tanks! They should be vulnerable to small arms fire. For starters, infantry should be able to close assault them, treating the crew as if in hard cover. It may be worth allow infantry to shoot them as well, also considering the crew as hard cover.
3. Soldiers in a building should be able to move away from the windows, so that they can not be targetted by soldiers with small arms. Basically, use a principal that if the troops can shoot out, then they can be shot at. Otherwise they can hunker down in their hard cover.