As I'm on a bit of a WWI kick, it's time to add to my available terrain. So here are some craters and similar terrain to place in no man's land between the trenches. Naturally, these craters will also be useful for WWII and other settings, too!

And as a bonus, this blog post includes a how-to article! The base for each of the craters is an aluminium tart or pie tin, to be mounted on wooden bases.

The tins are smooshed down into the basic crater shape, and the edge is trimmed off with scissors.

And a quick outline with a sharpie for the shapes that I will cut out.

I used my glue gun to secure the tins onto the bases, and then gave them a heavy coat of gesso. Getting paint to stick to aluminium is tricky - it flakes off very easily!

Using white glue, I put a mix of sand and coarse sand/gravel to cover the join between the tin and the base, and also the very rounded glue residue.

After leaving the gesso to dry, I added a thick base coat of burnt umber (aka dark brown) craft paint. And wait another day for it to dry. Lots of waiting in the project, very difficult for me!

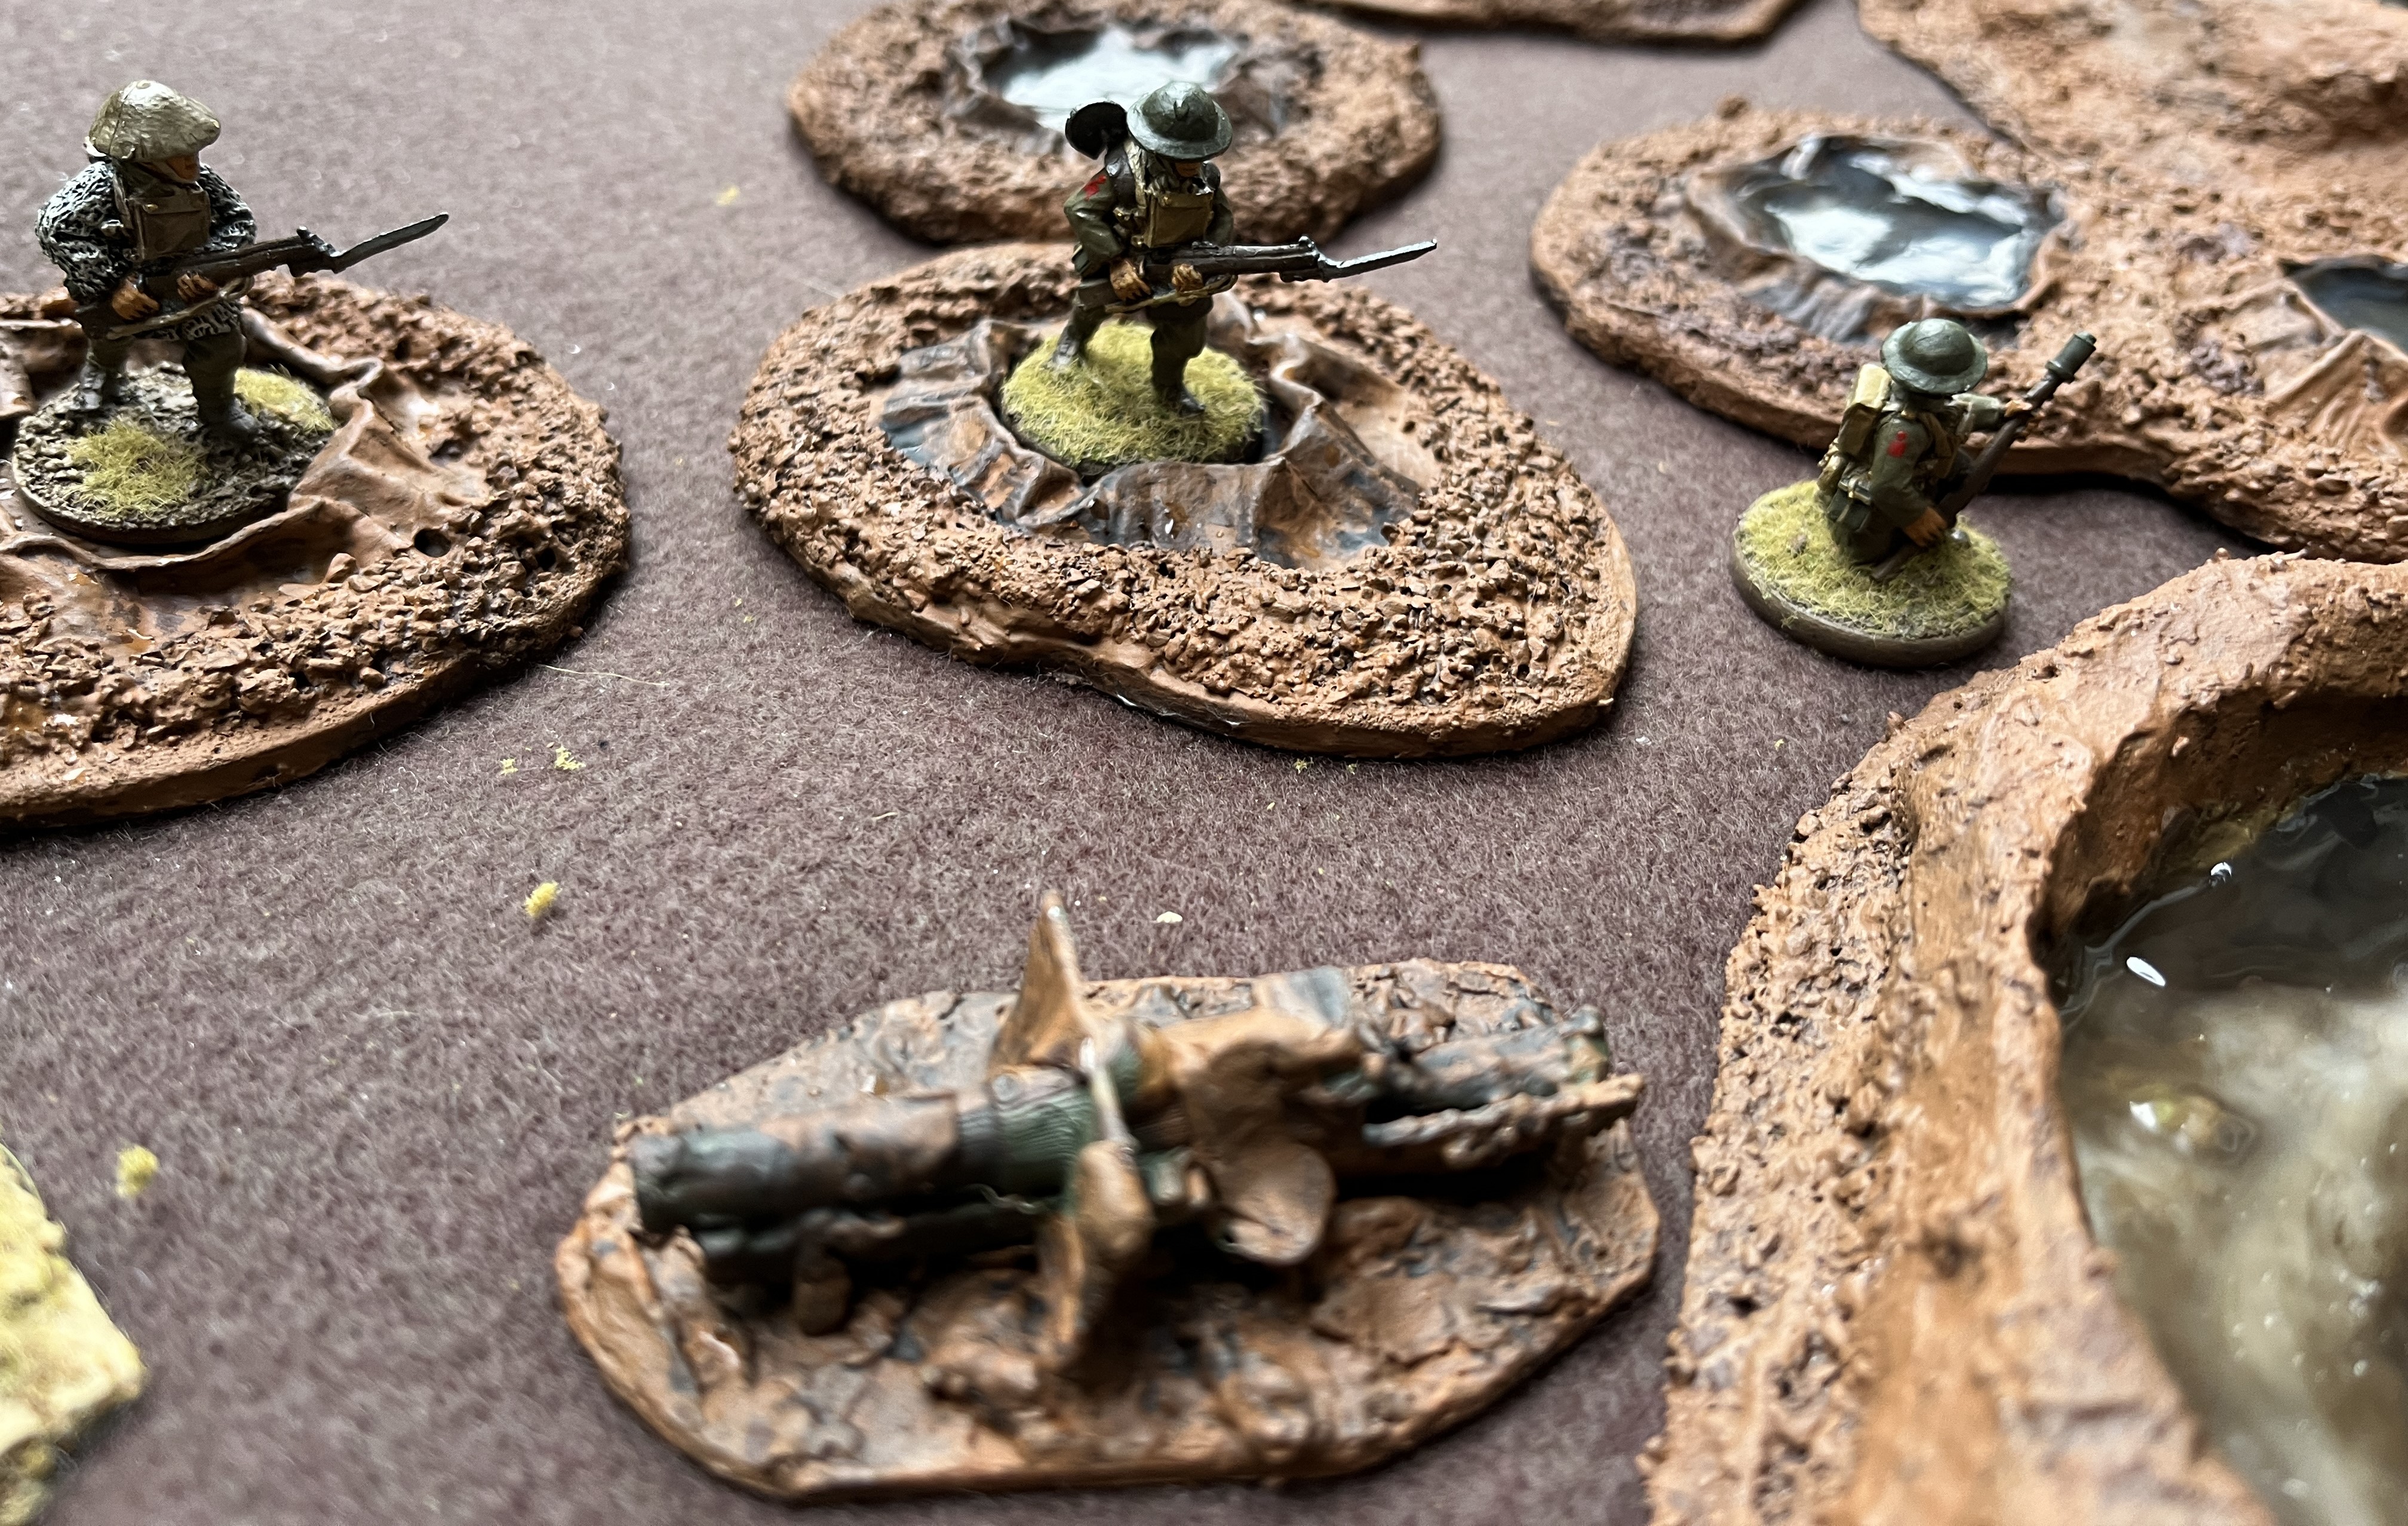
Then a dry brush with a lighter brown. In this case I used a shade called milk chocolate. Not for drinking! You can see some extra pieces in the photo below. These are gifts from Doug! The big craters are cut from styrofoam, and the gun is a mis-printed 3D printed artillery piece that will really add some distinct WWI flavour to the terrain. Thanks, Doug!

To make things a bit more interesting, I added a greenish-brownish base to some of the craters, and then (after another wait for the paint to dry), some Vallejo Still Water. I mixed in some GW Agrax Earthshade ink or wash. Unfortunately, the still water resin ended up coming in a bit milky.

Frustrated with milky still water, I pulled it out and re-gessoed the bases.

I also filled in the opening for one of the large craters with some air-dry clay.

Here are the final pieces. For some of the smaller pieces, the water effect worked out.

The larger pieces tend to show a bit of the cloudiness.


Playing around with the water effects was fun, but to my eyes, the crater on the left (with an agrax earthshade wash) looks about as good as the water effects in the crater on the right.

And finally, here are some shots with my GWM CEF added for scale.


Wow, effective work, lovely terrain!
ReplyDeleteThanks, Phil!
Delete