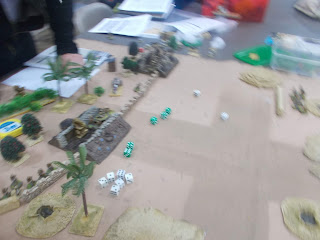
Real Life© has been keeping me pretty occupied for the past few months, so I was quite excited to go to Trumpeter's July meeting. I've been reading up on Chain of Command, and was able to persuade experienced Lard player Craig to join me in Jhamjar. Once we had the game under way, we were joined by Gord, another TFL enthusiast, who provided lots of helpful input.
My previous attempts to play CoC had been frustrating as game play takes time to move to play a scenario to a satisfactory conclusion. Forces will get a chance to deploy, move to contact and then we run out of time. I explored a few wargaming fora, and even asked some questions, where I was assured by Lardy loyalists that it's quite reasonable to play a game through to the end in the space of an evening, but that it's best to start with an 'attack on an objective' scenario rather than an 'encounter'. I took this advice to heart, and even went one step further by limiting the forces on the table. The scenario I chose was based on the 'Attack on a strong point' scenario from 'Stout Hearts and Iron Troopers' collection for 'Through the Blood and the Mud'. Things were slightly modified to accommodate playing Chain of Command, using the Cocking up Through the Mud and the Blood from the TFL 2014 Christmas Special.
Forces were deliberately kept small. Ockerforce had a full platoon, but the Jhamjar Rifles only had a Vickers gun (MMG) with two rifle sections. Attachments were kept to a minimum (a medic for the JR and a sniper for Ockerforce, neither of which really had much impact on play).
The scenario, in a nutshell: Jhamjar forces have seized control of the main road connecting their capital, Mar-mahl Aday, to British India. F.Ocker has been tasked to break through the opposition and reopen the road the capital. Below is the initial set up, showing the entrenchment that the Jhamjar Rifles have placed across the road. Ockerforce patrol markers are visible on the right (Union flags), and the yellow squares with red circles are the Jhamjar patrol markers.

We played the patrol phase twice, to help me get a better understanding of the process. Below are the Jhamjar jump of points (JoP), represented by statues of Ganesh, plus the donkey cart representing the objective.
Here the three motor vehicles are Ockerforce's three JoPs.
Ockerforce deploys a couple of sections of riflemen with a Lewis gun to start off the action. Using an ambulance to deploy soldiers - I think that might violate the Geneva Conventions! You can see that the troops are using their 'tactical' marker to show that they are keeping their heads down.
Another squad deploys
Craig deploys a rifle section in the trench.
And another rifle section in the other trench.
Ockerforce advances a section and starts laying down some fire, trying to force the Jhamjaris to keep their heads down,
But Jhamjar firepower instead forces the Ockers back into cover.
All the Jhamjar forces now on the table, and under hard cover in the trenches and adjacent cover.
Ockerforce gradually deploys the remaining sections behind cover.
Over the course of several turns, Ocker advanced the Ockerforce sections closer, so that they could fire on the Jhamjar defenders.
Here is a section with an attached sheep, representing one point of shock.
Jhamjar defenders, Vickers gun team in the centre, with a rifle section on each flank (the one on the left obscured by the palm trees).
The Jhamjari rifle section on the left has been wiped out by Ockerforce firepower. Ocker still won't charge over the open ground against the MMG, though!
Pretty much the end of the game. Jhamjaris have been reduced to the Vickers team plus a reduced rifle section, officer and senior NCO have been incapacitated. Jhamjar force morale was reduced so that they could no longer continue their resistance.
I enjoyed playing this game. The scenario was a bit unbalanced as it is in effect a training exercise for the attacker - the defender hasn't much choice except to sit there and take it, and to strike out against any errors made by the attacker. It showed the need for the attacker to position forces to suppress and gradually wear down defending firepower while getting in position for a final assault on the defender's strong point. We didn't do the assault, in part because I sent both senior leaders (Lt Ocker and his sergeant) to the right, where there was too much open ground to risk an assault, while there was no senior leader to lead the assault by the two sections on the left (especially after one of the two corporals there was killed).
I'm quite interested in playing more games of CoC, provided that there is enough time to play the scenario out in full. That's going to require a combination of increased familiarity with the rules to keep things moving, and keeping the scale of the scenario under control so that it can be gamed out in the time available for the game, either the 3-hour (+/-) for a club night, or a longer session if that can be arranged.
Thanks again to Craig and Gord for training me on Chain of Command!


No comments:
Post a Comment